


If you raced a full cyclocross season last year, or can’t remember the last time you had both an Allen key and your cycling shoes in your hands at the same time, it’s probably a great time to look into replacing your clipless pedal cleats.
Your two-bolt mountain bike cleats probably took a beating with all the dismounts, remounts and run-ups, and because they’re so critical to a confident and secure cycling experience, cyclocross racing or not, new cleats represent the best $20 or so spent in bike maintenance.
Worn cleats can lead to unintentional unclipping, whether it’s while sprinting against your buddies, or using body English to clear or hop an obstacle. Both can be ego blows at best, and result in crashes at worst.
But what if you can’t easily remove the cleats of your shoes?
The Perfect Springtime Project
A few years ago, we wrote briefly about this topic, offering tips on replacing stubborn stuck cleats before the spring cycling season was fully underway. Why spring? Spring is the perfect time to replace the cleats on all your two-bolt shoes. Your cleats have probably not only been beat to hell from cyclocross season, but this time of year many of us often divide time between different bikes in the quiver, whether it’s a winter bike, mountain bike, commuter or cyclocross/gravel bike. Hopping from bike to bike, there’s nothing more unsettling than different pedal spring tension or release points on each bike. Swapping between shoes with new and worn cleats, or hopping on a bike that was last ridden with new cleats can be a recipe for ejection or dejection.
Also, if you live in a wintry climate and have braved winter on two wheels, there’s a good chance your cleats have received more than their daily allowance of salt, which is conducive to rust and corrosion. That’s awesome for making orange snow tracks, but bad for easy removal of the cleats.
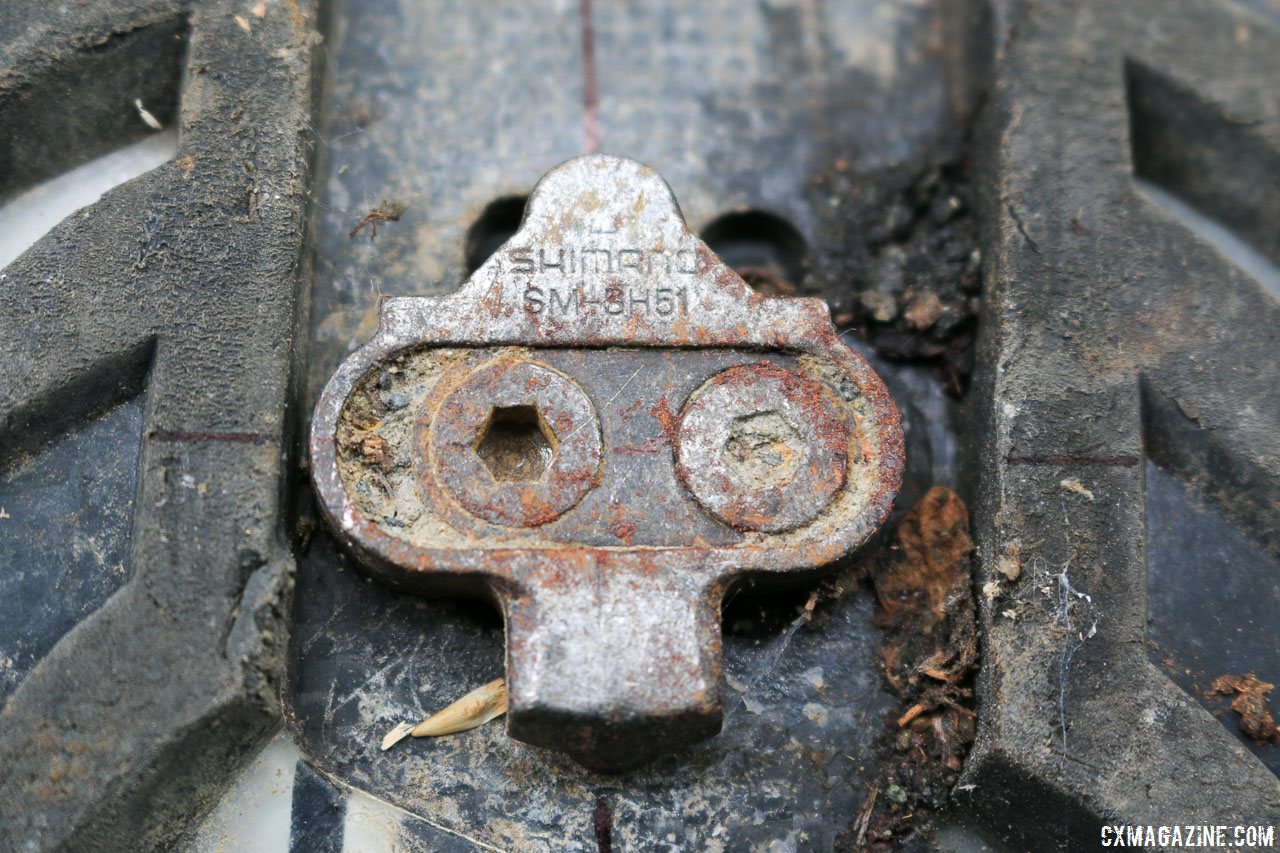
So assuming your shoes don’t need replacing as well, grab those kicks and have a look where the sun doesn’t shine on them. Do the bolts look anything like this?
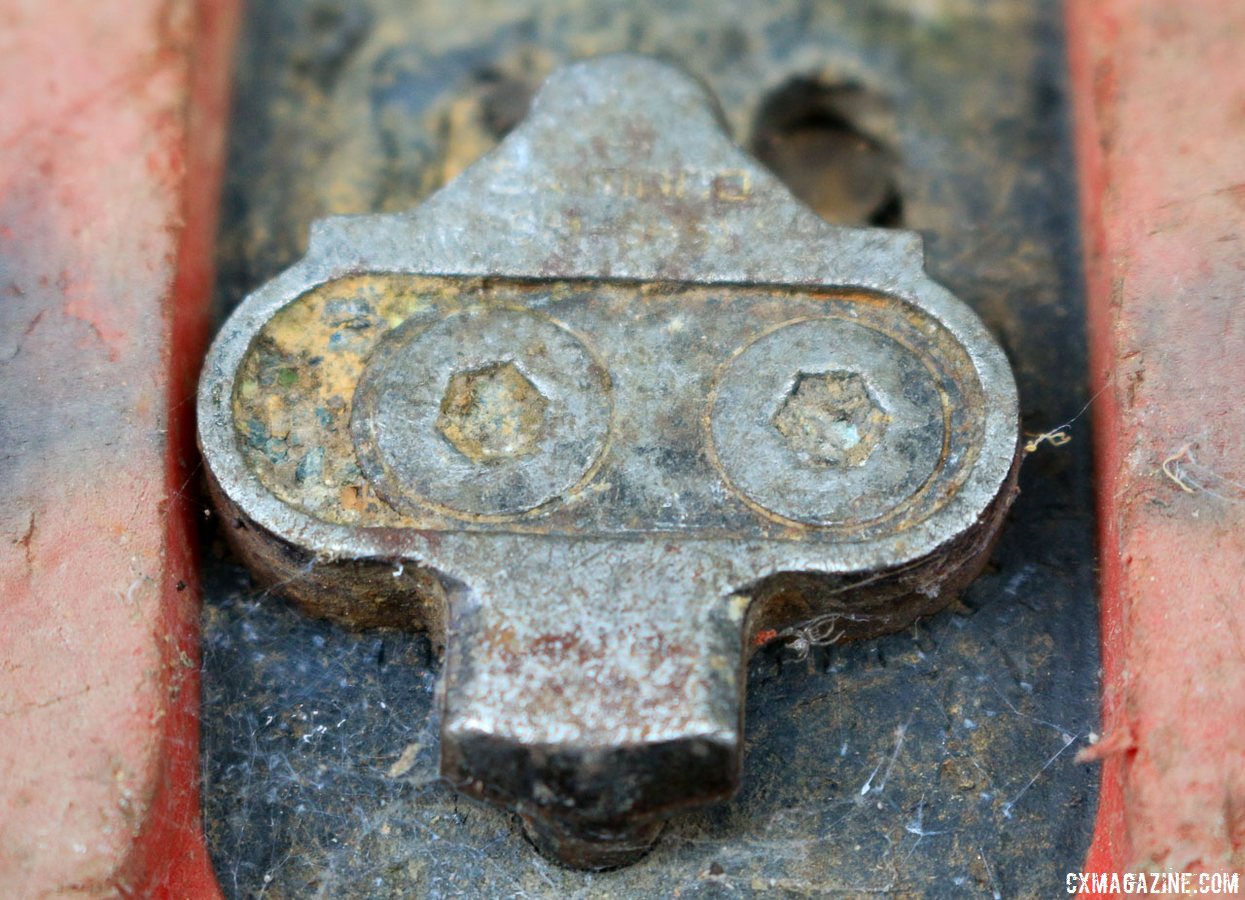
Spring is the perfect time to check, loosen and replace worn mountain bike cleats and bolts. Tips to remove stuck cleat bolts of SPD or other mountain bike pedals. © Cyclocross Magazine
Or worse yet, this?
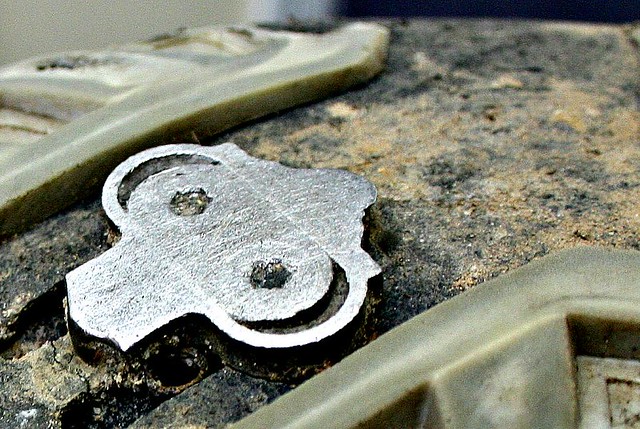
Obviously these cleats ended their useful life eons ago, but the bolts are what we care about. Can you see the hex wrench socket? Does it resemble anything like a hexagon? This determines the complexity of the task at hand.
If the holes aren’t just filled with dirt but resemble nothing like Allen key holes, and your shoes are tattered, consider your own time vs. money value before embarking into the following four-bolt adventure.
“Can you see the hex wrench socket? Does it resemble anything like a hexagon? This determines the complexity of the task at hand.”
However, despite our society’s throwaway tendencies, when there’s a will there’s a way when it comes to giving your shoes new life with new cleats. We’ve got a prioritized set up of steps to try to remove those difficult-to-remove Shimano SPD cleats (or CrankBrothers, Time, Look, Xpedo, Issi, Speedplay, etc.) in the slideshow below.
On Your Mark…
But first, a little prep work. If you’ve got a new pair of cleats ready to swap in once you’ve got the old cleats out, and are happy with your cleats’ position, grab a Sharpee and a ruler to mark your current cleat’s position. Draw a horizontal line on your sole on each side of the cleat that intersects the two bolt heads, and a vertical line that represents the center line of your cleat. This makes precise positioning of your next set of cleats easy (although there will likely be indentations on your sole that provide a decent guide).
Marking your cleat position before removing your cleats makes for precise positioning of the replacement cleats. Tips to remove stuck cleat bolts of SPD or other mountain bike pedals. © Cyclocross Magazine
Now onto the hard part: getting those bolts loosened. See our 8-step guide below. We’re hoping you only need to follow a few of them.
Steps to Remove Stuck / Stripped / Rounded SPD Cleat Bolts:
Step 1: Clean Out the Bolts
It may sound obvious but you can’t loosen a bolt if you can’t get the hex key in the hole. So the first step, assuming dirt from the last ride, or last season, is still holding on for the next ride, is to get that dirt out. My favorite tool is an eyeglass flathead screwdriver. It’s thin, sharp, and can chip away effectively at packed-in dirt along the flats and in the corners of the hex-shaped hole.
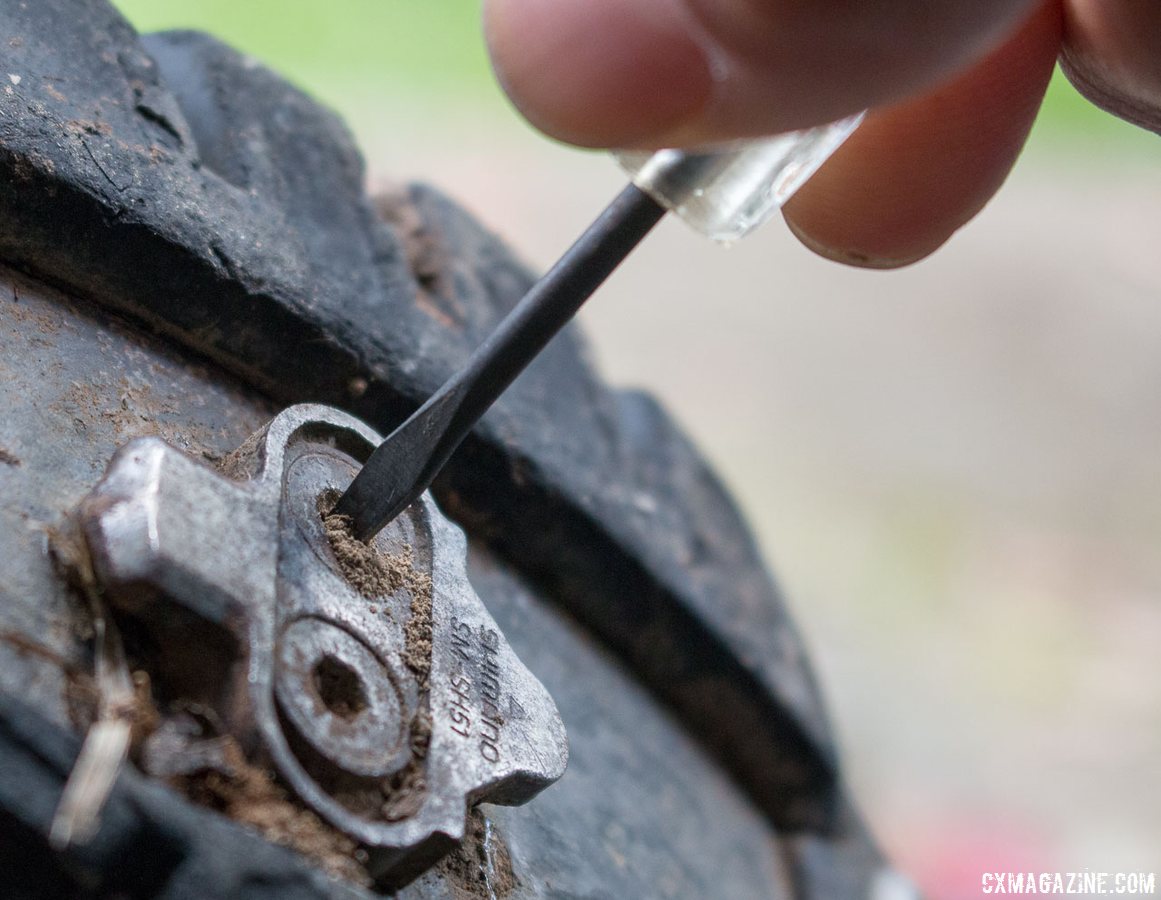
An eyeglass screwdriver makes a great tool for cleaning the cleat bolt’s hex socket. Tips to remove stuck cleat bolts of SPD or other mountain bike pedals. © Cyclocross Magazine
Don’t have one of those around? Your smallest Allen key or the tip of a corkscrew can work in a pinch. Scrape all that dirt out before moving on. Don’t cut corners, because it will result in unwanted rounded corners later.