
Let Daimo Shanks show you how to keep your brakes working despite the rigor of ’cross ©Daimo Shanks
It’s the off-season, so it’s time to be making changes to your cyclocross bike after what you experienced last season. For some, that could mean swapping brakes. Daimeon Shanks, pro mechanic and co-owner of The Service Course repair shop in Boulder, Colorado, will show you the finicky way of the cyclocross brake. Daimo shares his setup tips and tricks. Missed the last article on weather-proofing cables and housing? Go back and check it out. Also, be sure to see our authoritative, comprehensive article on cyclocross brakes including reviews, set up tips, and a full explanation of fork chatter in Issue 7 in print, as well as our technical analysis and review of the Avid Shorty Ultimate cantilever brakes published online last month.
by Daimeon Shanks
Cyclocross Brake Setup
After 16 years in the sport of cyclocross, there are many, many things that I take for granted as general knowledge. Recently, I helped a friend prepare for her very first ’cross race, and one piece of advice I gave her is something that we should all be reminded of from time to time – whether you’re a complete novice or an old hand. Your brakes just aren’t going to be really strong, especially if you’re used to hydraulic discs. There’s no way around it; the unique demands of cyclocross racing necessitate designs that compromise balance tire clearance, mud clearance, heel clearance, and braking power.
There are several brake options available these days, but the tried and true ‘Mafac’ style cyclocross brake is still the most predominant and effective option for all racing conditions. They provide plenty of mud clearance, the ability to remove wheels without opening them, and look damned retro-cool. The one thing they are not, however, is easy to set up.

Metal ferrules won't buckle under the pressure ©Daimo Shanks
Cable Routing
One of the more overlooked aspects of brake performance is also one of the easiest to address: Keep you cables as smooth as a baby’s bum and you’ll generate more braking power with less lever pull.
First, get the best housing and cables you can. If your kit comes with plastic ferrules, chuck ’em out and replace them with aluminum ones. Aluminum ferrules resist compression better and last much longer. Route your cables so there is minimal amount of kinking and bending. Make them as short as you can get away with; the less housing you have, the less friction there will be.

Routing cables over the top allows for a smoother brake line ©Daimo Shanks
I usually run the front brake cable over the top of the stem when I can. This may not be as aesthetically pleasing as using a noodle underneath the stem, but results in a smoother cable routing. Don’t worry if you can’t get the front cable hanger directly under the stem; it’s okay if it sits a little to one side or the other.
Straddle Cables
Straddle cables and Johnny Walker Black have one thing in common – they should be two fingers tall. A lot of the Euro pros, especially the decidedly old school Sven Nys, run their straddle cables much higher, because they believe it reduces front brake chatter. It may be so that back when all steer tubes were 1 inch and forks were only steel, it helped, but in today’s game, keeping your straddle cable low improves braking performance and doesn’t hinder mud clearance as much as you’d think.

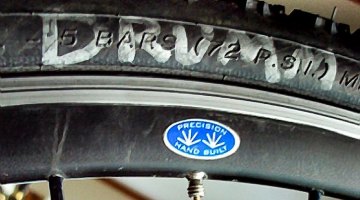
A two finger gap is all you need ©Daimo Shanks
If your straddle cable hanger came with multiple grub screws to hold the cable in place (such as the TRP hangers), I’d like to throw out all but one of ‘em. In a race emergency, it’s much easier to loosen and adjust one bolt instead of three. One is plenty to hold your cable in place, but of course, you should manage your own risk.
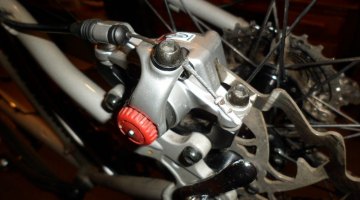
Spring Tension
There are two basic kinds of brake springs out there, the adjustable and the semi-adjustable.

Ditch all but one bolt for easier mid-race repairs ©Daimo Shanks
Fully adjustable systems are the type that are found on Paul’s brakes, TRP’s low-profile system, and Avid’s new Shorty Ultimate brakeset. The brake is centered by either adjusting a small grub screw or by means of a 15mm box wrench. These brakes do not straddle the cable hanger with a bolt, but a simple sliding hanger works great.
Semi-adjustable spring systems, like those found on TRP’s EuroX brakes, are a little trickier to set up. I always install the spring leaf into the center hole of the brake boss and it always seems to be the perfect amount of tension. Centering the brake is done by adjusting the straddle cable hanger left and right. This is where you need the bolt-style hanger; after properly centering the brake, you need to hold the straddle cable in place to maintain adjustment. [Ed. note, you can also carefully add or reduce spring tension on some brakes that don’t have any adjustment by winding the brake in the appropriate direction without the wheel in place. Do so with the utmost care as you can snap the spring.]
Pad Adjustment
Now that your straddle cable is in the proper position and your brakes are centered, the last thing to do is adjust your brake pads.
Road cartridge style brake systems are superior to the v-brake style cartridge setups; if you can swap them out, do so. The pads are easier to replace, last longer, and experience much less squeal and chatter.
The reverse toe-in often works better than the front ©Daimo Shanks
If you’re using brake pads that incorporate a post mounting system, not the v-brake style, then on many brakes you’re going to have a much harder time getting your brakes just right. I like to set up the pads with the posts mounted in the lever arms about halfway down the length of the post for the average width road rim. Play with the mounting position until you find a good compromise between raw power and smooth braking. Often because you can’t control the height of the pad but only the extension and the angle, you only have one pad position that will allow the entire pad’s face to hit the rim, flush.
Brake chatter isn’t just a product of the brake post adjustment, either. [Ed. note, also see our in-depth article on fork chatter and brake setup in Isuse 7] Usually it’s a combination of flexy posts, flexy forks, and a lack of toe-in on the brake pads. When I’m setting up a new bike, I adjust the brake pads to contact the rim perfectly flat, as this gives the best performance and best feel at the levers. When the pads squeal or I experience chatter, then I toe-in the brake pads, usually just the front.
Toe-in is relatively easy on v-brake style pads and I actually prefer a reverse toe-in (so that the rear of the pad hits the rim first), as I’ve found it works even better than the standard toe-in. If you don’t have v-brake style pads (or post mount pads with a toe-in feature such as TRP’s high-end offerings), then toe-in is achieved with a BAW tool. BAW stands for Big Ass Wrench.
Place a large adjustable wrench on the lever arm where the posts are mounted and gently bend the brake until a little bit of toe-in is noticeable. Be careful – don’t wrench too hard or you can snap the lever arm. This is a bit of a delicate procedure (with a decidedly un-delicate tool), so you should probably try it on someone else’s bike before you try it on yours. And you probably don’t want to do it on a carbon fork or frame – if you have a steel frame lying around, you’d be safer bending the brake on that frame and then reinstalling on your lightweight steed.