Going tubeless for cyclocross is an attractive option for anyone tired of pinch-flatting clinchers or gluing and re-gluing (or flatting) expensive tubulars. Cyclocross Magazine has long experimented with tubeless tires on our cyclocross bikes, in both cyclocross and mountain bike races, and feel that there are now so many attractive options for putting together a reliable system that it doesn’t have to be a risky experiment.
But like any new component or upgrade, it’s worth getting your tubeless cyclocross tires set up early, so you have plenty of time to fine-tune and test tires and different pressures before racing begins. There’s no better time than now. So with that in mind, we’ve given our Going Tubeless for Cyclocross Part 3 article an update, including new tires we’ve successfully tired tubeless and some new tubeless tips.
Avoiding the Burp – Tight Is Good
Perhaps you’ve read the primer on tubeless for cyclocross in Part I of our series, and learned how to convert a wheelset for tubeless in Part II, but are worried about the infamous “burp” or want to avoid the pitfalls of others. No problem. Many of us have had to learn it all the hard way, including suffering a few DNFs along the way, but you can learn from our collective experiments and mistakes in Part III of our series. (It goes without saying that like cyclocross, experimenting with your tires and wheels can be dangerous and should be done at your own risk! )
Maybe you’ve tried tubeless already, or have heard stories of disastrous burps from others. It certainly can happen if your setup isn’t ideal. Burping during riding or a race can be WORSE than many pinch flats or punctures, as an extreme burp can result in a fast loss in pressure, the tire coming off the rim, and perhaps, a loss of control. So it’s really important to get your tubeless tire system right.
Does that mean you’re constrained to Hutchinson’s versatile tubeless-compatible Bulldog and Piranha tires and a high-end, road tubeless-compatible Shimano, Roval, Bontrager, Fulcrum, A-Class, or NoTubes wheelset? Not at all. There are many factors that dictate a reliable tubeless system that can handle low pressures. Some of these are a rim’s sidewall height, depth of the rim’s center channel, rim width, a tire’s sidewall stiffness, a tire’s bead circumference and stiffness, and of course, rider weight and style. And now we’re finally seeing a lot more options in “official” tubeless-compatible cyclocross tires than the Hutchinson and NoTubes tires.
Sound overwhelming? It can be if you have to measure all of these variables and figure out the perfect combination from scratch. But thankfully for you, you don’t! We’ve done much of that experimentation already.
From our extensive testing, your primary goal is to get a tight-fitting tire when the tire is fully-mounted on the rim. Note, that isn’t the same as a tire that’s hard to mount on the rim. If you have a rim with tall sidewalls or a deep center channel (such as the Mavic Open Pro), many tires will be hard to get over the rim’s sidewall, but won’t be tight once mounted on the rim. Stan Koziatek from NoTubes says, “any tire that fits too loosely on the rim will burp air easier [than a tighter tire] when mounted tubeless.”
Road Tubeless Does Not Apply
The Road Tubeless system developed by Hutchinson and Shimano is not relevant to the world of cyclocross, in our opinion. Although road tubeless can allow lower pressures in road riding without the fear of pinch flats, the Hutchinson Tires’ Road Tubeless bead is still built for high pressure and designed to be very stiff so that it will not blow off the rim under the high psi’s required by road tires (at the high pressures of road tires, you never want to try to convert a conventional road tire because its bead will stretch).
But the whole goal is to ride lower pressures without flatting, right? Our experience has been that because the road tubeless bead is so stiff, it has a slightly looser fit in order to fit over the sidewall of a rim without stretching and without requiring tools. While the mechanical lock between the tire and a tubeless-ready rim is excellent at the high pressures it was designed for, to run at really low pressures (with sealant), you need a tighter fit, not a stiffer bead. This is why the early versions (non-carbon bead) of the Hutchinson Bulldog and Piranha tires weren’t super-reliable low-pressure performers as tubeless cyclocross tires, and as a result, tubeless tires in cyclocross quickly gained a bad reputation. Many have hear stories of someone giving it a try, and not having much luck at low pressures.
But if you already have a pair of tubeless-ready wheels and want to ride lower pressures without burping, don’t fret. You may just have to make a few mods. The Redline cyclocross team raced tubeless extensively the last few seasons, and has found a reliable, low-pressure setup by adding rim strips to the Shimano Dura Ace wheels. (Note: the newer carbon bead versions of the Hutchinson tires sit very tightly – and can be inflated with a floor pump – but require very high pressures (80+ psi and some soapy water to ensure a complete bead seat/seal.)
Get a Tighter Fit – Choose the Right Rim or Build Up the Rim’s Center Channel
How do you ensure a tight fit between your tires and rim, regardless of whether it’s tubeless-ready? There are two ways: find tight-fitting tires and build up the rim’s inner diameter. Want to get it right the first time? You may have to do both.
As Josh Patterson described in Part II of this series, to convert a standard rim or NoTubes rim, you need to seal off your rim’s nipple holes, and he recommends NoTube’s yellow tape or a layer of strapping tape. While doing this, you can add an extra layer or two of tape to build up the center channel diameter on a standard rim. Some folks use Velox tape as well, and although the cloth can do a good job of conforming to the bead of a tire, we prefer non-cotton material that does not absorb sealant.
While tape may help create a tighter fit, there’s a reason NoTube’s conversion kit includes a thick rubber rim strip. The rubber material takes up some space, effectively reducing the sidewall height, but also conforms around the tire bead, creating a tighter seal.
NoTubes’ rims, with their unique Bead Socket Technology hook bead profile, whether the 29er rim brake rims or the new Alpha 340 road rims (reviewed in Issue 12), have performed particularly well as a component to convert standard tires to tubeless.
Choosing the Right Tire
One of the benefits of running a tubeless setup over tubulars is that you are not limited come race day by the number of wheels you have pre-glued. You can select and setup a tire the night before a race based on the course conditions and weather. But to have a successful race, you can’t just choose any tire. You need to make sure the tire will seal well and not burp.
The two things you should look for are a tight fit, as we’ve already mentioned, and a supple sidewall. Stan from NoTubes says, “The stiffer the sidewall, the easier it will burp air.” Why? A supple sidewall not only offers a better ride and will absorb smaller bumps (this is why a tubular’s ride is superior) but will avoid transferring a bump’s energy to the bead. The less a bead is impacted, the less chance it has to deform and burp.
Portland’s Erik Voldengen, a long-time tubeless evangelist, blogger, and Masters A racer, weighs 195 pounds and races tubeless exclusively. He races on pressures between 25 and 30 psi, and had zero burps in a full season of racing last fall. Erik has experimented with many tires, and warns, “The stiffer a tire casing is, the higher pressure you need to ride it at.” He explains, “Riding a stiff tire at too low a pressure makes it fold over on itself and really makes cornering unpredictable. I think it also makes the tire more prone to burping. I believe stiffer tires are more prone to coming off the rim, too.”
So what’s a good tire to try? Of course, tires that officially support tubeless use are a great choice. The newer carbon bead versions of the Piranha and Bulldog tires from Hutchinson have been very good and reliable, if not heavy options for low-pressure use. We’ve been testing an early version of a sealant-compatible version of the Kenda Kommando that should be out soon and has been burp-free at low pressures, just like it’s non-sealant-compatible brother. Vittoria should have its Tubes-No Tubes versions of its cyclocross tires out as well.
But a reliable tubeless cyclocross system does not require officially tubeless-designated tires (if you don’t mind voiding your warranty), and many have had success with a number of normal clincher cyclocross tires. Results from our own experiments and those of our knowledgeable cyclocross community have shown the following:
Tires successfully used in tubeless conversions: (new additions in bold as of 2014)
-Hutchinson Bulldog (carbon bead)
-Hutchinson Piranha (carbon bead)
-Kenda Kommando, Kommando-X
-Kenda Small Block Eight
-Kenda Slant Six
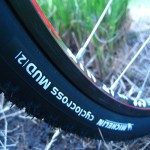
-Michelin Mud2
-Michelin Jet
-NoTubes Raven
-Panaracer Cross Blaster
-Vittoria XG (TNT & standard)
-Vittoria XL TNT
-Vittoria XM
-Vittoria XS
-Hutchinson Toro
-Hutchinson Piranha 2
Tires that have worked well tubeless but only on NoTubes/Stans rims:
-Hutchinson Bulldog (non-carbon)
-Hutchinson Piranha (non-carbon)
-IRD CrossFire
-Panaracer Cinder-X
-Specialized The Captain
-Vee Rubber XCX 40c
-WTB Nano 40c
Tires that have not worked well as tubeless:
-Clement PDX (Clement tires have sealed up well initially but then seem to stretch, making for an unreliable tire long-term)
-Clement LAS
-Continental Twister Pro
-Maxxis Raze
-Any skinwall tire (original Michelin Mud or Open Grifo)
-Duro Ellie Mae
-Ritchey Shield
Note that there are now at least seven tubeless-ready cyclocross tires on the market, with the CXM Editors’ Award-winning Specialized Captain 2Bliss, Vittoria’s XL Cross and XG TNT models, NoTubes’ Raven and Kenda’s SCT models of the Kommando, Slant Six and Happy Medium. IRC has a new model coming out, and Hutchinson had the Bulldog and Piranha carbon bead Tubeless-Ready tires, and has pledged to return to the market in 2013 or 2014.
(Can’t find any of the above tires at your local bike shop? You can pick up most of these tires online.)
Your results may vary depending on your rim, strips used, tire pressure, course and rider weight. Have an experience with a tire you’d like to share? Add a comment below or join the discussion here.
Sealant Options Abound
While the Stan’s sealant is the most popular option for tubeless conversions, there are now plenty of other options out there. Effetto Mariposa Caffe Latex is another good option, and provides a foaming action keeping more sealant closer to the tread throughout the tire, instead of sitting in a pool at the bottom. Hutchinson has its Fast’Air canisters for on-the-trail repairs, but we haven’t had much success with this formula. We have had much success with the Hutchinson Protect’Air Max sealant, which to us, looks, smells, and performs much like Stan’s sealant. There are also other options from Slime, Specialized and Bontrager among others.
A DIY Tubeless Rim Strip
Cameron Falconer’s budget tubeless setup: Two cheap MTB rubber rim strips, a UST valve, and a WTB Interwolf tire on a Open Pro rim.
While the NoTubes conversion kit (see your local bike shop, NoTubes.com or online here) is a convenient choice, enterprising, budget-minded riders have made their own rubber strips. Northern California’s perennial top A racer, Cameron Falconer of the Freewheel / Hunter Cycles team, devised his own system before realizing that off-the-shelf tubeless rim strips were available for 700c wheels. He uses two cheap rubber rim strips available for 26″ mountain bike wheels, just wide enough to just fill the width of the road rim. Using one strip on top of the other, he places each strip’s valve hole on opposite sides, at 90 degrees from the rim’s valve hole. Then he pokes or cuts a small hole for a UST presta valve (used on tubeless mountain bike wheels) and adds Stan’s sealant.
Other experimenters have carefully sliced an inner tube to create a DIY rubber strip with a built-in valve.
Share Your Experience
Hopefully this series of articles has helped reduce the learning curve in riding tubeless and eliminated some of the fear and myths with tubeless tires. But just as there is with tubulars, there will be a learning curve. If you’re going to try tubeless, start now, and just as you should with your first gluing job or bike assembly, test your setup cautiously. Hopefully by the time September rolls around, you’ll have it dialed. Good luck. (Also see Part I and Part II of this series on tubeless tires for cyclocross).
A DIY Tubeless Rim Strip
While the NoTubes conversion kit (see your local bike shop, NoTubes.com or online here) is a convenient choice, enterprising, budget-minded riders have made their own rubber strips. Northern California’s perennial top A racer, Cameron Falconer of the Freewheel / Hunter Cycles team, devised his own system before realizing that off-the-shelf tubeless rim strips were available for 700c wheels. He uses two cheap rubber rim strips available for 26″ mountain bike wheels, just wide enough to just fill the width of the road rim. Using one strip on top of the other, he places each strip’s valve hole on opposite sides, at 90 degrees from the rim’s valve hole. Then he pokes or cuts a small hole for a UST presta valve (used on tubeless mountain bike wheels) and adds Stan’s sealant.
Other experimenters have carefully sliced an inner tube to create a DIY rubber strip with a built-in valve.

