by Kenton Berg
It’s nearly mid-September and by now a good portion of y’all reading this will have raced already or will be prepping to race this next weekend. If you’ve been to your first race you undoubtedly heard the moans of some poor soul who flatted his or her newly glued tubular and can’t believe they have to go through those dreaded steps again. You know, clean, stretch, glue, et cetera! If you’re lucky enough that this poor sap isn’t you, then a little bit more prep work can stave off this scenario.
The latest Cyclocross Magazine informal poll shows that over 50% of you will be racing on tubulars this fall. With that in mind, and as a follow up to our previous two articles about cleaning your tubular rims and gluing your tires, we bring you part three in tubular prep. Step three is all about protecting your $100-per-tire investment. The art of tubular protection boils down to two things: sidewall protection and flat resistance by way of a sealant.
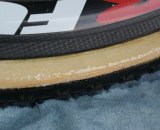
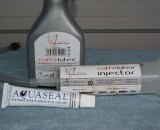
Sidewall protection is accomplished by using a urethane sealant that will protect the sidewalls against abrasion and water damage. Aqua Seal is the most popular of these sealants and has been used extensively by cyclocross racers for years. The application of the urethane sealant is done once the tire has been glued on the rim and is applied in the same fashion as glue. A small acid brush comes with Aqua Seal and you just need to brush it on evenly. It takes about 12-24 hours for it to dry and you’re ready to ride.
To protect the inner portion of your tubular, you can use an injected sealant, like Caffelatex, which will offer puncture-repairing action by way of a foaming agent that stays in your tire. While the wheel is in motion, it causes the the sealant to expand and fill the entire tire cavity and thus, the puncture. Companies, like Stans No Tubes, offer similar products.
The inner sealant is typically applied via an injector mechanism, whether that be one that screws onto the valve stem or has a “needle-like” tip, and is then dispersed by spinning the wheel while on the bike or on a truing stand. Once that is accomplished the tire can be ridden and the sealant fluid is continuously worked around inside of the tire/tube. Both companies, Caffelatex and Stans, claim that the sealant will stay liquid inside the tire for two to seven months and should be checked regularly.
So, follow these two easy steps and that little bit of time and money invested may save you the $100 grimace this weekend. Happy Suffering!
[Not too long ago, CXM’s Gut Wrenching Mechanical Monday’s series brought you an alternative to Aqua Seal. Turns out that recommendation got all the way to the main Rabobank mechanic – not an easy man to convince to try new things – and he now uses our alternate method. Check that out here.]


