
Gluing tubulars is a fine art, but a do-it-yourself strong, clean job is possible.
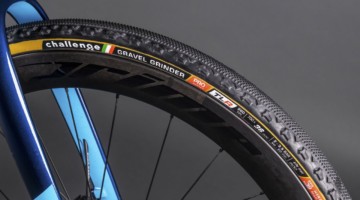
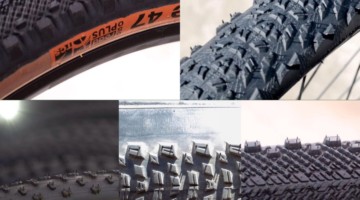
We’ve been reviewing new tires like the Limus from Challenge, and talking about some great wheelsets you might want to consider for the season. A few we’ve looked at so far include the Williams Cyclocross Tubular, the Zipp 303 Cyclocross Tubular and the Rolf Prima VCX Cyclocross Clincher. Other than the Rolf Prima, a distinct tubular pattern is emerging, so a recap in proper tire-gluing technique seems prudent. Besides, it’s almost July, we miss the smell of cyclocross in the air (and by that we mean autumn breezes or glue), so what better way to get started than by gluing up a few tires? Today, we bring you one of our older How To’s that still comes in handy!
If you want to race as fast as possible, tubulars are the tires of choice. But get your tires glued up and ready to go before the races start so you can test out tire pressures, learn the traction capabilities of the tire’s tread, and be sure your glue job will hold up. Want to be confident in your gluing job? One way is to learn how to do it yourself. It’s not rocket science (it’s adhesive science). To help you get it dialed, we’ve got some tubular gluing tips for you. (A version of this article appeared in our Issue 4. See also our article on using glue and tape for cyclocross tubulars. And if it all seems too messy or risky? Hire a professional or consider giving tubeless a try. Mounting tires always involves serious risk – be careful and consult experts.)
by Nicholas Keough
The first tubular tires were developed for road racing in the early 1900’s as a replacement for the conventional solid rubber tire. Until the development of the high performance clincher tire in the early 1980’s, every serious cyclist was familiar with the process of gluing tires to their rims. Slowly the tubular tire became less and less common on all bikes but the most serious of cyclists. The art of tubular gluing slipped into the darkness, practiced only by the mechanics of top athletes.
With the sport of cyclocross growing in popularity in the United States, there has been a greater demand for higher performance tires that can only be found in tubular form. Historically, companies such as Tufo, Challenge, and of course, Dugast have found the cyclocross market in the U.S. so great that importers can’t even keep them in stock. No matter how much money an enthusiast was willing to spend, you just couldn’t get them. But with the establishment of Dugast USA and Challenge USA and availability of tires from companies like Vittoria and Tufo, that all changed. With tubulars as the new “must have” accessory for any cyclocross enthusiast thanks to the ease of cornering, the low pressure and the supple sidewalls, all of the glamorous appeal to the desirable sew-up is lost without the knowledge and application of a proper glue job.
We’ll detail the all-glue process here. Some people swear by the glue-and-tape method, and we’ll bring that to you shortly.
When gluing tubular tires you must first have the proper materials. You want a large, clean, well-ventilated work space, and the following:

Vittoria's Mastik One is a popular tubular glue and comes in tubes or a good-for-many-wheels can.
- a substantial amount of the tubular glue of your choice (you never want to run out mid way through)
- multiple disposable thin-bristle brushes (acid brushes are cheap and work well)
- rubber gloves
- tubular wheels
- tubular tires
- a work apron (or clothes you don’t care about ruining)
- a tire pump
- optional: sandpaper and a rubbing alcohol or a light solvent
Before you get started, it’s important to consult your wheel/rim manufacturer’s guidelines before gluing up your tire, especially for carbon rims. Every manufacturer has different tips and warnings, especially when it comes to cleaning the rim.
1. You will first need to make sure that you have stretched the tires for at least twenty-four hours. To do this just take the tire and stretch it over any tubular rim that is accessible, then pump it up to about 60-80 psi. Leave them in a warm place for about one day, longer will not hurt. Allowing your tires to stretch is crucial to getting the tires to go onto the rim easily when there is wet glue and time is of the essence. If you take the time to prepare properly it will make the final outcome a lot less messy. If you’re in a bind, you can carefully use the foot method: stick your foot in the tire, and pull the opposite side. Repeat this process around the tire, moving a shoe width at a time.
2. Clean the rim. If you are not using new tires and rims, old glue is fine, but make sure that there is not excessive glue build-up on either gluing surface – take care to remove bigger chunks of glue to ensure a smooth-rolling tire and strong glue job. You can use a butter knife, solvent, or a product like Goof-Off or Goo-Gone to remove stubborn sections. Again, consult carbon rim manufacturer’s guidelines before dissolving your pricey hoops with a strong product. Most alcohols should be safe-safe on the rim, not in your system, especially if you’re behind the wheel, tubular or automotive.
If you have a new rim, some rubbing alcohol and a rag are useful to clean the rim and remove any oils or release agents (for carbon molds) from the factory that might coat your rim. This really is critical, as they can interfere with the holding power of your glue!

Acid brushes for tubular gluing are cheap and perfect for the job. Available at your hardware store.
3. With your clean rim, starting at the valve stem hole, apply a thin bead to the clean gluing surface, about half of the way around. Remembering to move quickly take one of your brushes, and smooth out the bead of glue across the gluing surface to its consistent and thin. Work your way around the rim until you have reached the point where you started. Remember, consistent, thin layers.
4. Set this wheel aside, grab the other wheel, and do the same. Now let them sit for at least a few hours if it’s warm and dry … longer if cold or humid. If you’ve got time, let these coats dry overnight.
5. If you want to be safe, go back and repeat with another thin coat on each wheel. Let them sit another day. Some people skip this step since the thickness of the glue is not what creates a strong bond. But doing another thin layer can ensure you haven’t missed any spots. Let that sit overnight again.
6. Finally, move to the tire. After the tires have stretched for a sufficient amount of time, take them off the rim and place them on your work surface. Make sure that if you have deep dish rims you install the valve extenders now. Inflate the tires enough so that the cotton gluing surface rolls slightly upwards. If your basetape is slippery and latex-coated, take a file or some light sandpaper to rough up this surface a bit. You can consult with the tire manufacturer if you’re not sure if your basetape is coated.
Now take your glue and apply a thin bead of glue directly to the tire half way around, starting at the valve stem, making sure to keep the amount evenly applied. Then take one of your brushes and smooth the wet glue evenly across the entire cotton surface. Be sure to move quickly so that the glue doesn’t dry before you are able to smooth it out. Repeat this step until you have worked your way all the way around the tire, being sure to keep an even coating on the surface. Although you want a thin coat, cotton can absorb the glue, so make sure you can see the glue on the tire. (Update: some people do multiple coats on the tire and let them dry, just like on the rim, but tire companies have advised against this, as the basetape can break with the hardened glue when stretching the tire onto the rim. We prefer one coat thick enough to make sure it’s not all absorbed).
7. Now move back to the rim. Using your glue, apply a final coat to the rim’s gluing surface, I call this the sloppy coat. Ultra-uniform application is not the most important with this layer. Be quick with the coating, and don’t waste time before the next step-this layer needs to act like a lubricant.
8. This is where the job gets a tricky. Make sure that you have your pump handy and a clean floor surface and take both the tire and the rim. Line up the tire so that when you put it on the rim the tread pattern is facing the correct direction. Deflate the tire and place the valve stem into the rim. From there stretch the tire in a downward motion with both hands, applying the two glued surfaces together, working your way around the rim (this is where the pre-stretching pays off). It is going to be messy until you get the hang of it so just get the tire on the rim as cleanly as you can, and as quickly as you can.
9. As soon as you get the tire on the rim, pump the tire up to about 80 psi. This will begin to seat the tire. Quickly work your way around the tire, centering it on the rim. Some work on the uninflated tire and try to center it, as it’s looser on the rim, but unless there is some gross misalignment, a pumped up tire will better reveal any imperfections in manufacturing and it also gives you a solid grip to adjust the tire while centering it. You can use the basetape as a general guide, but it’s important to note that these hand-made tires may not have a perfectly straight basetape.
When you have it straight, spin the wheel in your hands or in a truing stand and look for wobbles in the tire. Keep working at it until you are satisfied with the straightness. However, some handmade tires are not perfect, so you just need to get the tire as straight as you can. If you don’t get it straight enough you will feel it when you are on fast grass or pavement sections.
10. Once you have the tire lined up, carefully clean off any excess glue that may be on the braking surface with your rim-safe solvent. You do not want the glue to dry on the braking area as it will make you brakes stick. You also don’t want your tire to be in contact with any of the solvent…it can ruin your gluing job or cause the tire to separate from the base tape. Allow the inflated tires to dry overnight in a warm place. 24 hours in all but the coldest, dampest environments should do the job.
Tire gluing is an art that can take time to master. Until you are entirely confident with your gluing ability, do not race on tires that you have not tested out beforehand. The only way to learn to glue tubular tires is to practice, and gluing tires for yourself is the best way because you don’t want to make any mistakes.
Of course it goes without saying that any cyclocross activity, especially gluing tires involves risk. Crashing due to a rolled tire can be extremely dangerous and painful if not fatal, so follow these instructions and any others on this website at your own risk. Test your tires with your hand and in training at slower speeds at your race tire pressure before going all out. If you can grab the tire and roll it off your rim without an immense struggle at any pressure, you don’t have a strong enough bond. Back in the day, officials would roam the start line of crits trying to roll everyone’s tubular. It’s a good test to try after letting the glue dry but before you ride your own tires. Hitting an awkward turn at full speed can apply more leverage to a tire than your hand.
And keep checking that glue job before each ride. A good glue job should last you a season, but power washers, harsh conditions, and storing your wheels wet (rotting the base tape) can all impact the longevity of the glue’s bond.
Once you make the switch to tubulars I bet you will never go back, so happy training, racing, and gluing.
Nick Keough has been a U.S. Worlds Team member, has finished second at Nationals as a U23, and comes from a New England family of cyclocross-racing brothers that goes through more tubular glue than your average family consumes milk.