


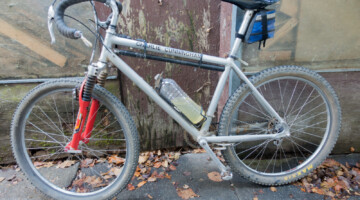


Chandler Snyder shows some quick and dirty ways that anyone can keep a drivetrain running smoothly, muddy race after muddy race. © Colorado Capture
From the man who brought you “The Glitter Method” two weeks ago, Chandler Snyder is back to talk about how you (yes, you!) can handle overhauling your drivechain and getting your chain Nationals and Worlds prepared. While we’re fans of low-maintenance systems like Gore’s discontinued Sealed Low Friction Ride-On cable and housing sets, they’re becoming harder to find and common setups can work just fine with a little regular maintenance and care. Snyder provides his own time and mud-tested techniques for keeping your bike squeak-free. Can’t get enough Mechanical Monday advice? Check out our piece on Shift and Brake Cables and Housing, Demystified.
by Chandler Snyder
It’s coming down to the wire for those heading to cyclocross nationals and worlds over the next month and a half. Many aren’t really looking to sink tons of money into installing new parts, changing cables/housing and other big ticket items.
The number one enemy of mechanical shifting is friction. The more friction, the more force needed to shift. More force can lead to problems such as over-shifting, throwing your rear derailleur into the rear wheel (your R.D. should be adjusted properly so the likelihood of that has been reduced to a minimum) and a big ol’ migraine from all of it!
Here are a few tune-ups that will help your drivetrain run smoother and a little more trouble free over the next few weeks. These are things that can be done by the amateur mechanic in the privacy of his or her own home, with no special tools required.
Easy Cable/Housing Tune:
What you’ll need:

A workstand makes mechanic-ing much easier. © Colorado Capture
- Work stand (or some other way to keep bike stable while rear wheel is out).
- Lightweight grease: I use Buzzy’s Slick Honey, and Dumonde Tech Liquid Grease, both are made to run super slick with minimal amount used.
- Rags
How to do it:
- Place the bike in the stand and shift into small chain-ring, small cog in the rear.
- Remove rear wheel and set aside.
- Unseat housing from all of the stops. This can be done two ways.
• Using the rear shifter, shift the derailleur into what would be the largest cog position if the wheel were in. Holding the rear derailleur in that position and using the rear shifter again, shift down to the smallest cog position. This will create slack in the cable, allowing you to unseat the housing from the stops.
• Grabbing the rear derailleur and manually pushing it into the largest cog position by hand will create the slack, allowing you to unseat the housing. All you need to do is one end of housing, that will allow you to let go of the derailleur and unseat the rest of the housing. - Using a rag, clean the cable by sliding the housing: exposing sections of cable that usually remain housed. You might feel some grit and grime when doing so. Be sure to inspect your cable for any damage or fraying. If you see any, then stop what you’re doing and have it replaced.Take to your trusted mechanic unless you feel comfortable doing it yourself.

Use a rag to wipe clean and inspect cables. © Colorado Capture
- After you have cleaned the rear derailleur cable, pull the ferrules off the ends of the housing and clean where they’ve been interfaced. Lots of creaking typically comes from this junction.
- Once the cables, housing/ferrule interface have been cleaned it’s now time to grease/lube.
- Apply a small amount (usually pea-sized) to your finger and thumb and apply it to the cable, paying attention to the sections that will be inside the sections of housing.

A little lube goes a long way. © Colorado Capture
- Slide the housing back and forth across the cable so as to distribute the grease as evenly as possible.
- Next take a small amount of grease and very lightly coat the end of the housing where the ferrule will sit when back in the frame. Again, this helps to reduce the creak as well as keep more dirt and dust out of the system.
- Reinstall the ferrules on the housing.
- Now it’s time to reinstall the housing/cable on the frame. Begin at the front of the bike and work towards the rear. When you get to the last housing stop or two, manually create slack in the system by pushing the rear derailleur into the largest cog position again. Once all of the ferrules are in their stops, you can release the derailleur.
- Reinstall wheel in frame, and adjust shifting as needed. You might find you can actually take some tension off your cable since the friction has been reduced.


If you’re running a front derailleur, this can be a little trickier to do, as you may have to unbolt the cable from the derailleur. I wouldn’t recommend this unless you are comfortable reattaching and adjusting the front derailleur limits.
One more point on this, you can also use the same cable/housing cleaning and lubing method with your brakes as well, assuming they are not internally routed. You’ll feel a difference in the return of the brake lever.
Chain Cleaning/Lubing:
We’ve all heard a million different ways to clean, why we should clean, how to lube, when to lube our drivetrains. I’m going to go over the method that has worked best for me, and the one my clients have come to trust.
Unless a chain is completely caked with lube/dirt/grime, and is not rusted because of this, I don’t degrease, period. There are a couple of reasons why. Many lubes on the market these days have some sort of a plating action in them. Degreasing removes this plating, which is supposed to accumulate over time, and sets you back to square one on the lube train.

A little lube goes a long way. © Colorado Capture
Jerry Ott, of Campagnolo North America, states Campagnolo uses ultrasonic technology to impregnate their chains at the factory with lube. This gets every single bushing, pivot and plate coated with lube for a smooth running/sounding chain. Campagnolo recommends against removing and degreasing even after using a chain for some time due to the fact that all those pivot points will be stripped dry of that lubrication. When reapplying lube, many people simply look at the large rollers/links as the points to lube, forgetting all the side plates and internal bushings. So no matter how much the links are lubed, there will be squeaking during use. Ott also says, “We also recommend not exceeding 2000 miles, which is our life span for chains. This will increase the life of the cassette, with proper maintenance!”
Andy Devol (of Dumonde Tech Racing Oils) recommends the same. Andy’s advice is this: “You only need lube when it sounds like metal on metal, or Tweety Birds, otherwise the lube is doing its job.” Just because it looks dirty, doesn’t mean the chain isn’t lubed. Over-lubing can cause just as many problems as under lubing.
I like to use a method called “The Plastic Bag” trick. It borrows a line of thought from tubular gluing. When gluing, layers of glue are added and stacked because the new wet glue interacts with the cured layer, “activating” it and allowing the new glue to bond to it, adding another layer over and over until it’s time for the tires to be pulled on.
By using lube as your cleaner, you “activate” the old lube on the chain, allowing it to be cleaned/wiped off with little effort.
How it’s Done:
- Again, start with the bike either in a work stand, or on a level surface where the cranks can be spun backwards with no interference, (you’ll know very quickly if your shifting has been tuned correctly).
- Shift the chain to the big chain ring, and to one of the smaller/outer cogs on the cassette. This brings the chain “away” from the frame/chainstays, and gives you more surface area to work with.
- Make sure you can freely back pedal the cranks with no jumping or skipping before proceeding. If you cannot, readjust your shifting first.
- Begin by taking your lube bottle and laying the tip of it on the lower section of chain (under the chainstay) and squeezing just enough to allow the lube to flow. Back pedal the cranks, dragging the chain across the tip of the bottle. In doing so, you create a capillary action that drags the lube out of the bottle. I don’t recommend squeezing lube out, as it wastes lube and becomes over messy to deal with. Do this for approximately 2-3 full chain revolutions, not crank revolutions.
- Next, do the same by applying lube to the “top” of the chain, above the chainstays.
- Here’s the fun part. Take a plastic bag, not a sandwich bag(too thin),but one that has some thickness and rigidity to it(one that comes to mind is the one SRAM cables/housing comes in), and hold it one hand, palm open. Take your bottle of lube and apply back and forth on the bag, much like drizzling icing on a cinnamon bun (mmmmm cinnamon buns).

Plastic bag: the ultimate tool. © Colorado Capture
- Grab the lower section of chain (below chainstays) gently and begin to slowly back pedal, dragging the chain through your hand/bag. Once you’ve done a couple revolutions of chain, you can “scrub” the chain in sections by holding the crank arm still with the right hand and running the bag back and forth with the left. You will notice that the chain gets dirtier and dirtier.
- Once you’ve done a couple revolutions of “scrubbing” the chain with the lubed bag, you’re done … for now.
- Read the directions on your lube. Some lubes (like the one we use from Dumonde Tech) need to sit for a few minutes to allow the plating action to begin. Let the lube sit, go pour another cup of coffee, or check your Twitter updates for a couple minutes.
- Now, grab your rag. I like to use microfiber rags for this because they grab dirt, and clean better. Hold the rag on the lower section of chain, gently as the rag will want to grab much easier than the bag did, and begin to back pedal the cranks again. Essentially what you’re going to do is wipe all the excess lube off the chain, taking all that dirt off with it. Rotate clean sections of rag a couple times and your done. With Dumonde Tech, they recommend you wipe until it looks “dry,” (meaning not “wet”) with lube.
- After 2-3 full chain revolutions, your chain should look almost like new.

A bright and shiny “new” chain. © Colorado Capture

Now this method won’t make your chain look like it’s straight-outta-the-box brand new, but pretty darn close. By using the plastic bag, you lubricate the side plates/bushings as well as really get the chain coated with the optimal amount of lube. The bag won’t absorb any of the lube either, meaning you don’t waste as much and you can “scrub” without worrying about tearing a rag and getting fibers in between the links.
Couple of side notes to consider:
- After wiping the chain clean, you might come back a little while later and the chain will look dirty again, or wet with lube. That’s due to the new lube seeping in and pushing, or bleeding the old dirty lube out. Just use a rag again and wipe it clean.
- The other, is that while you’re waiting for the lube to penetrate, in between the plastic bag and the rag steps, you can use a rag to clean the pulley wheels by gently grabbing them from the sides and back pedaling slowly and carefully. You want to make sure you don’t grab a piece of rag and pull it into the pulley cage. If it does grab, then stop pedaling backward, gently pedal forward and the rag will be let go.
- If your chain is just dirty and not making noise, just use the plastic bag to clean it.
Remember, if you’ve trained like a mad person all year, hired a coach, watched what you ate, how you slept … shouldn’t your bike get the same amount of love and attention?! Treat it right and your next race will be your best!
 Are you and your tubulars heading to Worlds or Nationals? Pro Bike Express, a Colorado-based bike transport company, and Snyder Cycling Services, a Colorado-based service company, have teamed up to offer the Pro treatment at Cyclocross Nationals and Worlds. Find out more here.