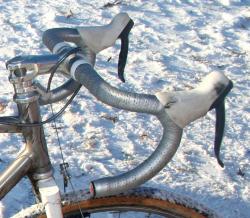
CXM’s Josh Patterson hacks his SRAM Double Tap levers for our readers. Update: As of 2010, SRAM offers several singlespeed brake lever options (the S900 and S500) that don’t require gutting a DoubleTap.
Many racers find running a single front chainring an effective means of saving weight and lessening the chance of mechanicals — a single ring setup can be a blessing when race conditions turn muddy.
It makes sense to dispense with unnecessary weight and unused mechanical parts when simplifying a drivetrain. You can achieve this without running a left shifter, but many folks don’t like to do this because of the different shape and feel of a plain left brake lever when compared to the right shift/brake lever. Your solution? Gut that fancy left shifter. It’s possible, and has been a common hack with Campy. But now cyclocrossers running SRAM components are in luck! All SRAM Double Tap levers, Red through Rival, are user-serviceable. The shifting mechanism and shift lever can be removed. And, if done properly, they can be reinstalled.
If you’ve ever called SRAM Tech Support, the lively voice on the other end of the line is often that of SRAM technical guru Ed Nasjleti. Ed was kind enough to explain the procedure for removing the internals from a Double Tap lever. He also wanted me to convey the following to our readers:
Removing the internals from a SRAM shifter does not negate the warranty. However, damage to shifter resulting from the removal or installation of the internals does not constitute a warranty claim.
In other words, attempt this procedure at your bike’s peril. And furthermore, don’t go whining to Ed if you bite off more than you can chew!
So with that in mind, away we go!
Level of difficulty: 4/5
Estimated time required: 20 minutes
Tools needed:
- Small Philips screwdriver
- Small flathead screwdriver
- Small punch or a 4mm allen key
- 2mm allen key
- Needle nose pliers
- Hammer
- Magnetic parts tray (optional)
Step one: Remove the left Dual Control lever from your bike; remove the brake and shift cables.
Step two: Remove the brake hood. This is best accomplished by sliding the hood forward and over the lever blade.
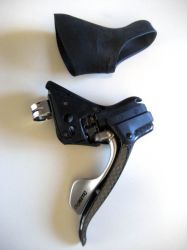
Step three: Take off the cover. Once you have the brake hood removed, you will see three small screws on the inboard side of the lever. These screws secure the plate that protects the internals. Unscrew them and set them aside, preferably in a magnetic parts tray.
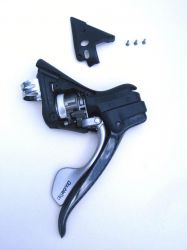
Step four: Remove the brake lever blade. To remove the lever blade, the brake lever pivot on which the lever pivots must be removed.
Tip: Before you begin, pivot the Dual Control lever out of the way. Use a small flathead screwdriver to gently pry open the plastic sleeve that fits over the brake lever pivot. Gently spreading it will allow you to use less force to remove the brake lever pin.
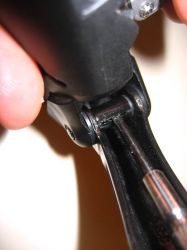
Place the shifter so that the inboard side-the side with the now-exposed shift mechanism-is facing up. Place the shifter on top of a vise or a surface that will allow the pin to slide out the bottom while supporting the lever body.
Tip: I used a vise, but if you don’t have one handy, a roll of tape duct tape will support the body of the Dual Control lever while allowing the pin to slide out.
Using a punch or a 4mm allen wrench, give this pin a few good taps to dislodge it from the body of the lever. Place the pin in your parts tray.
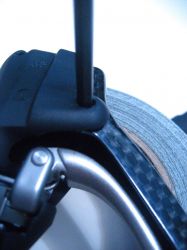
Now you can remove the brake lever from the shifter. Make sure you don’t lose the small plastic washers on the ends of the lever blade. You’ll need to make sure they’re in place when it’s time to reinstall everything.
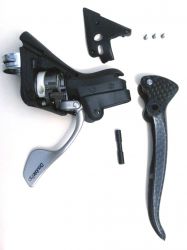
Step five: Remove the shift mechanism axle. Here’s where the fun begins! On the outboard side-opposite of the internals-you will notice there is one screw. This screw keeps the shift mechanism axle in place; we don’t want to keep the shift mechanism in place. Back the screw out just enough to make the shift axle visible.
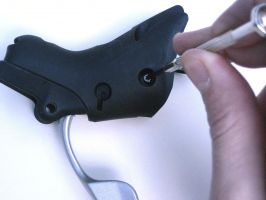
Use a 2mm allen to push the axle through the back of the shifter.
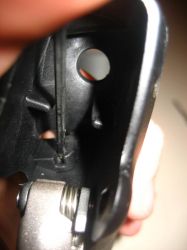
Remove the axle by sliding it out using needle nose pliers.
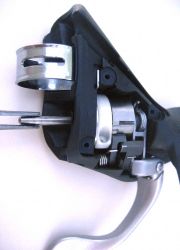
Step six: Remove the Double Tap lever and take-up reel. Now that the axle that holds these two parts in place has been removed, the Double Tap lever and take-up reel can be removed by hand.
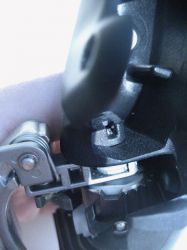
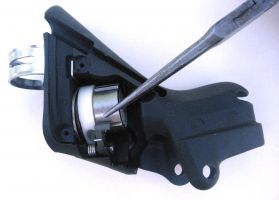
You have now removed all of the guts of the front shifter with the exception of the holding pawl, which stays in place.
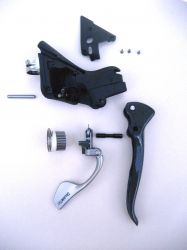
Step seven: Reassembly. SRAM recommends the shift mechanism axle be reinstalled, as it plays a structural support role. Slide the axle into place, then tighten the holding screw down. Once the axle has been replaced, you can install the cover.
Step eight: Reinstall the brake lever blade.
Check two things before installing the lever blade: First, make sure the plastic washers are in place on both sides of the lever-where the pin goes through the lever blade.
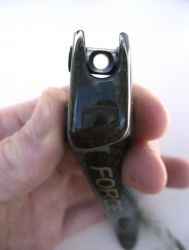
Second, check to make sure the beveled side of the brake cable stop is facing towards the outside of the shifter. If you install a brake cable with the stop rotated backwards, it will rattle.
Reinstall the lever blade; use a hammer to tap the lever pin back into place.
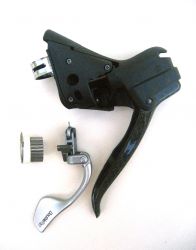
Step nine: Almost done!
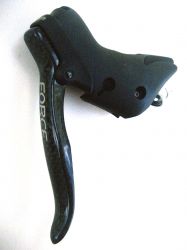 Now that you’ve successfully taken apart and put (most of) your shifter back together, put the brake hood back on and reinstall the brake on the handlebars.
Tip: For safekeeping, keep the internals you removed in a baggie. You may want to run a double ring again someday.


