Just in time for SSCXWC, we’ve got a how-to article on singlespeed conversions. This article is part of the Singlespeed Overdose feature in Issue 2 which also reviewed tensioners and covered the first edition of the Single Speed Cyclocross World Championships in Portland, Oregon. Be sure not to miss our follow-up singlespeed how-to article and training tips in our upcoming Issue 15. Subscribe today!
by Andrew Yee
Plato once said, “Beauty of style and harmony and grace and good rhythm depend on simplicity.”

Adam Craig converted his TCX Advanced just before the 2010 Cyclocross National Championships by finding the magic gear. © Cyclocross Magazine
Ah, simplicity. My garage is not simple. It’s cluttered with bike crap of all sorts, projects in disarray, and several things that should be fixed, maintained, sold or given away. My life is really not much different. When a rare quiet moment appears, my mind still races through the list of life things I haven’t done, need to do, and need to fix.
Ironically, racing ‘cross is a rare escape from my racing mind – the one coveted moment during a hectic week when I have a singular focus and goal. It demands my full attention to both stay upright and ride as fast as possible. Over the years, I’ve found the easiest way to maintain and enjoy this singular focus is through racing a singlespeed.
Why singlespeed? Isn’t ’cross hard enough? Sure, steep hills with one gear get a little harder, but you’d be surprised how much you can do with just one gear. Also, there’s less friction with a straight chainline and no derailleur pulleys. Singlespeed bikes end up being lighter without shifters, cassettes and derailleurs, and more reliable without the risk of those parts getting gunked up. But perhaps the most appealing benefit is the mental state of riding a one-speed. You’re one with your bike, focused on the course and maintaining your speed. This Zen-like focus becomes addicting and is a refreshing change from fighting the bike and forcing it to adapt to every change in terrain in an attempt to find the perfect gear.
Don’t own a singlespeed? Don’t fret. You can purge yourself of the sins of eight, nine, ten, or even sixteen, eighteen, and twenty. Get ready to repent and study the ten easy steps to convert your sinful bike.
Ingredients for the simplest conversion:
- Double chainring crankset (non-compact) and single chainring bolts or chainring bolt spacers (you can substitute a single chainring crank of course)
- Rear wheel with cassette freehub
- A BMX or single freehub-compatible cog, without ramps or missing teeth, and cassette spacers
- A chain tensioner (see our reviews) OR frame with horizontal dropouts or track forks, OR a bunch of cogs, chainrings, chains (of various amounts of use), a tape measure, and a lot of patience
- A new 8-speed chain
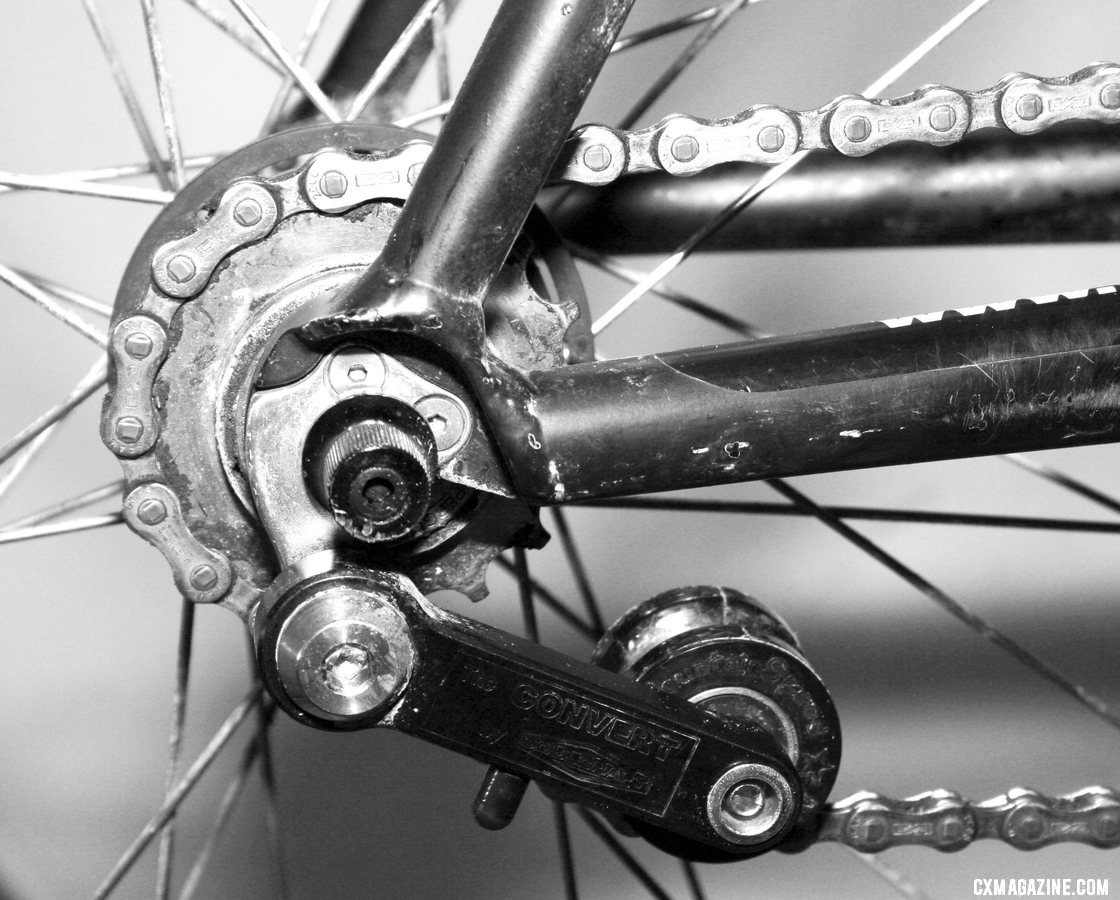
Soulcraft’s Convert Tensioner is one of our favorites. © Cyclocross Magazine
Optional:
- One or two chainring guards or bash guards, or chain watcher
- Brake levers without shifters
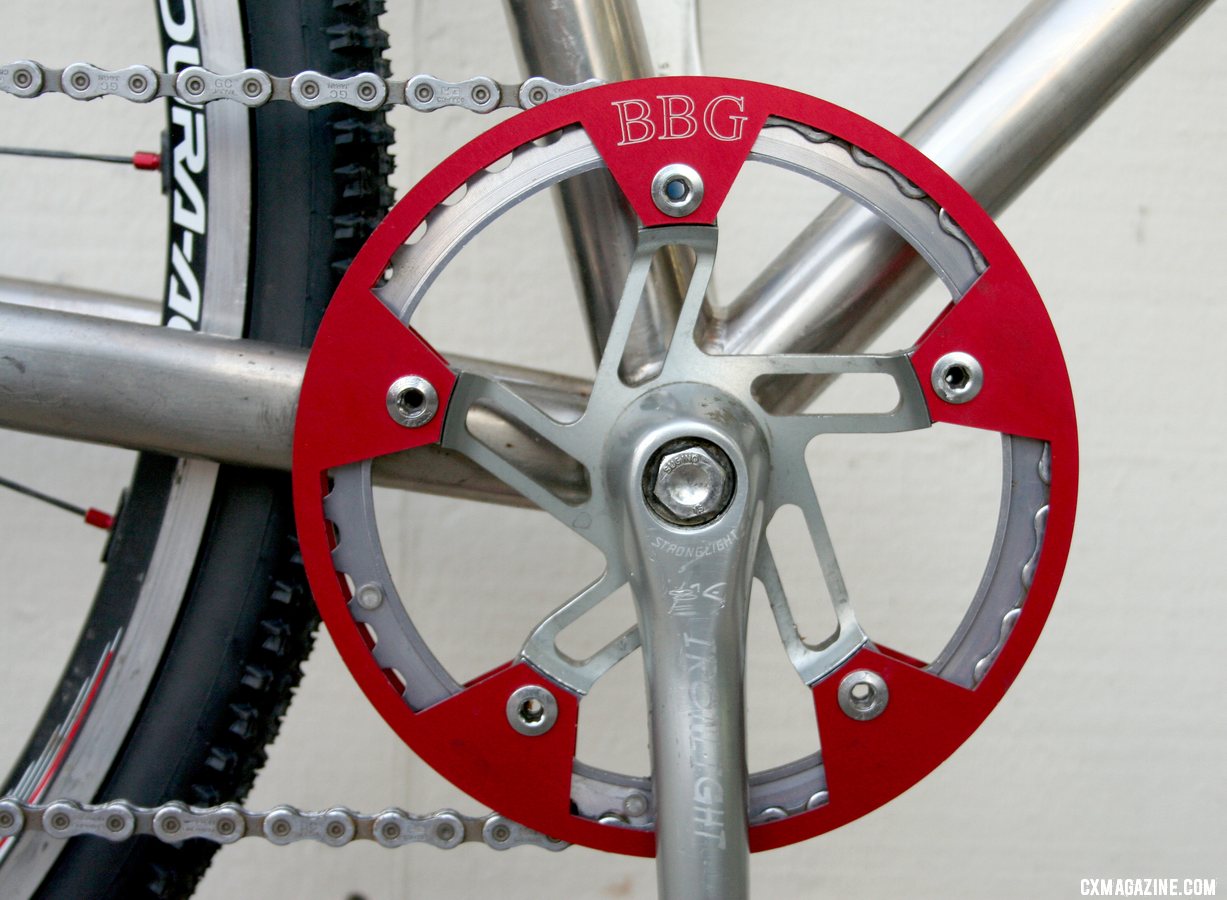
Dual chainring guards can keep your chain in place when conditions get nasty, bumpy, or your chain tension or chainline isn’t perfect. © Cyclocross Magazine
Directions:
- Repeat to yourself five times, “I need a straight chainline!” Then ride your current bike around to determine what gear you’d like to try. A common gear is 39×17, or about 62 inches.
- Unless you have horizontal drops, read our tensioner review article first and then get what you think best fits your needs.
- Remove the shift cables, housing, front derailleur, rear cassette, brake/shift levers if you’ve got replacement brake levers, and then the rear derailleur.
- Install your tensioner on the derailleur hanger. Most tensioners work better with chainrings in the outer position, but you should check, especially if the tensioner does not offer much lateral adjustment of the pulley or roller. Stand behind and in front of the bike, and sight the two to determine whether it aligns better with the inner or the outer chainring.

Dual chainring guards keep your chain in place. © Cyclocross Magazine
- Remove both chainrings and install the smaller chainring (likely a 38, 39 or 42) in the appropriate spot using the single chainring bolts or spacers. If you’re moving an inner ring to the outer position, you’ll likely need to reverse it to still accept the chainring bolts. (If you have a compact crank, your smaller chainring is probably a better bet, as it might be hard to find an appropriate cog to match your outer 48t or 50t chainring, but more teeth results in more teeth engaged and longer wear.) Chainring guards, especially when used two at a time, may require a longer bottom bracket spindle and/or longer chainring bolts.
- Install your spacers (you can take apart old worn-out cassettes and reuse the spacers) and cog on the freehub, taking great care to make sure they line up with the tensioner and chainring. Note: avoid using the older plastic Shimano spacers ones as they typically have nubs that prevent stacking and would have to be filed off.
- Read the instructions that came with your tensioner. Then install the appropriate-length chain, often the shortest amount of chain that can adequately wrap the cog and chainring without the tensioner.
- Adjust the tensioner to take up the slack. Use the push-up position if it’s an option to get better chain wrap on the rear cog, but some fatter chainstays may not allow this.
- Spin the cranks backward. Do they spin freely? Are there tight spots? If there are tight spots, try loosening the chainring bolts to see if the chainring is bolted slightly off-center. Chainrings usually aren’t perfectly round but this minor adjustment may eliminate uneven chain tension.
- Check to make sure everything is tight, aligned, and go ride! Try some light pedaling first before pushing hard and going into bumpy sections. If you’ve set it up correctly, the cranks should spin effortlessly, and the chain should never derail. Now start training for that golden Speedo!

Notes:
-
- You can use a wheel with a threaded hub and a BMX freewheel, but getting the chainline right may be difficult without respacing and redishing the wheel. Also, many older hubs are spaced at 126mm, while modern ‘cross bikes are either 130 or 135mm.
- You can use a rear derailleur as a tensioner! With a very short chain, and a short piece of brake or gear cable, you can lock a derailleur in place to run beneath one gear. Depending on your chainline and rear derailleur, you may be able to use the high-gear limit screw to align the rear derailleur with your cog. But if this isn’t enough, just grab a short piece of cable with a cable end still in place, insert the cut end into the barrel adjuster, hold the derailleur roughly in alignment with your cog, and clamp it to the normal cable clamp. Turn the barrel adjuster to fine-tune the alignment so that the chainline is correct. Select a chain length so that the rear derailleur cage is nearly fully extended. If it’s too loose, you’ll risk derailing when the course gets bumpy.

Use a short cable segment and a rear derailleur to make your own tensioner. © Cyclocross Magazine
- It is possible to avoid a tensioner altogether by finding the “magic gear” that works both with your legs and with your bike. We’ve used this method on some bikes with mixed success. There are calculators to help you determine what gear combination will work with your bike. Our favorite is: http://www.eehouse.org/fixin/. It takes into account chainstay length, chain stretch, and gives you more options if you use a half-link. But because there are so many variables, the calculator and charts only speed up the trial and error process. You’ll likely have to try several combos before finding the perfect one, and not many folks have a slew of rings and cogs to experiment with. You may also have to replace your chain frequently to avoid stretch by adding too much slack. But this offers the lightest, simplest, and most aesthetically-pleasing option for those who have the patience.
- If you have a PF30 or BB30 bottom bracket, an eccentric bottom bracket could help you build an elegant rig and tension your chain.
- Zip ties work great to quickly convert a bike with SRAM DoubleTap levers to a singlespeed. Simply zip-tie the shift levers tight to your brake levers, and cut off the ends. A singlespeed in five seconds! But you might wanna check with the promoters, USA Cycling or the UCI to see if they’ll approve your rig.
-

White Industries offers its ENO eccentric hub to make singlespeed conversion possible without a tensioner. © Cyclocross Magazine
If you really start to get into single-speeding, you may find yourself spending more money on your “simple” bike than your geared one. Purpose-built singlespeed wheels can be as expensive as fancy road wheels, but can offer options such as White Industries’ ENO hub with an eccentric rear axle to eliminate the need for a tensioner.
- Despite the many dedicated singlespeed options, Mark Lalonde, winner of the singlespeed race at the 2007 ’cross nats, used a Mavic Ksyrium rear wheel with spacers and a single cog on his Bob Brown singlespeed frame.