For last week’s Mechanical Monday we took a look at disc brake pad considerations. And we’re following that up this week by talking about bleeding disc brakes with TRP’s Bryce Olsen, SRAM’s Nate Newton and Shimano’s Nick Murdick. Bleeding disc brakes is needed maintenance over time and is the process of purging the brake system of old fluid and replacing it with new, clean brake fluid. The reason to do this is that dirt or air can contaminate the system over time, both of which reduce brake performance.
In order to bleed your brakes you’ll need a few items aside from basic tools found on most home mechanic workbenches like hex sets and screwdrivers. First, you’ll need a bleed kit for your brakes. TRP, SRAM and Shimano all offer various bleed kits that contain a syringe, hose, compression plugs (or similar), clamps and in most cases brake fluid. If you’re purchasing fluid separately the type of fluid you need, mineral oil or DOT fluid, depends on what your specific system requires.
When to Bleed Your Brakes
The most basic question regarding bleeding disc brakes is how often to do it. If a rider is pulling their brake levers to the bars each time they go to scrub speed, that’s a sign. But when asked about a regular interval to do so, both Olsen and Newton said that their companies recommend bleeding hydraulic systems once a year. Both TRP and SRAM also recommend bleeding brakes more often if you’re riding aggressively and/or on terrain that requires heavy braking.
Shimano’s Murdick said that “[p]rofessional mountain bike racers need to change their fluid every 6 months or less. Most recreational mountain bikers should do it annually. Many road riders can go several years without touching their brakes. The service interval is based on the fluid getting dirty. Dirt changes the viscosity of the fluid, hurts the fluid’s ability to dissipate heat and can damage the brake itself. Dirt around the caliper pistons and under the seal can lead to piston imbalance, lack of power and scoring the pistons permanently affecting their function.” He also added that “For mineral oil brakes, dirt entering the system is the only thing dictating the service interval. DOT fluid should be changed about every two years because the boiling point drops over time.”
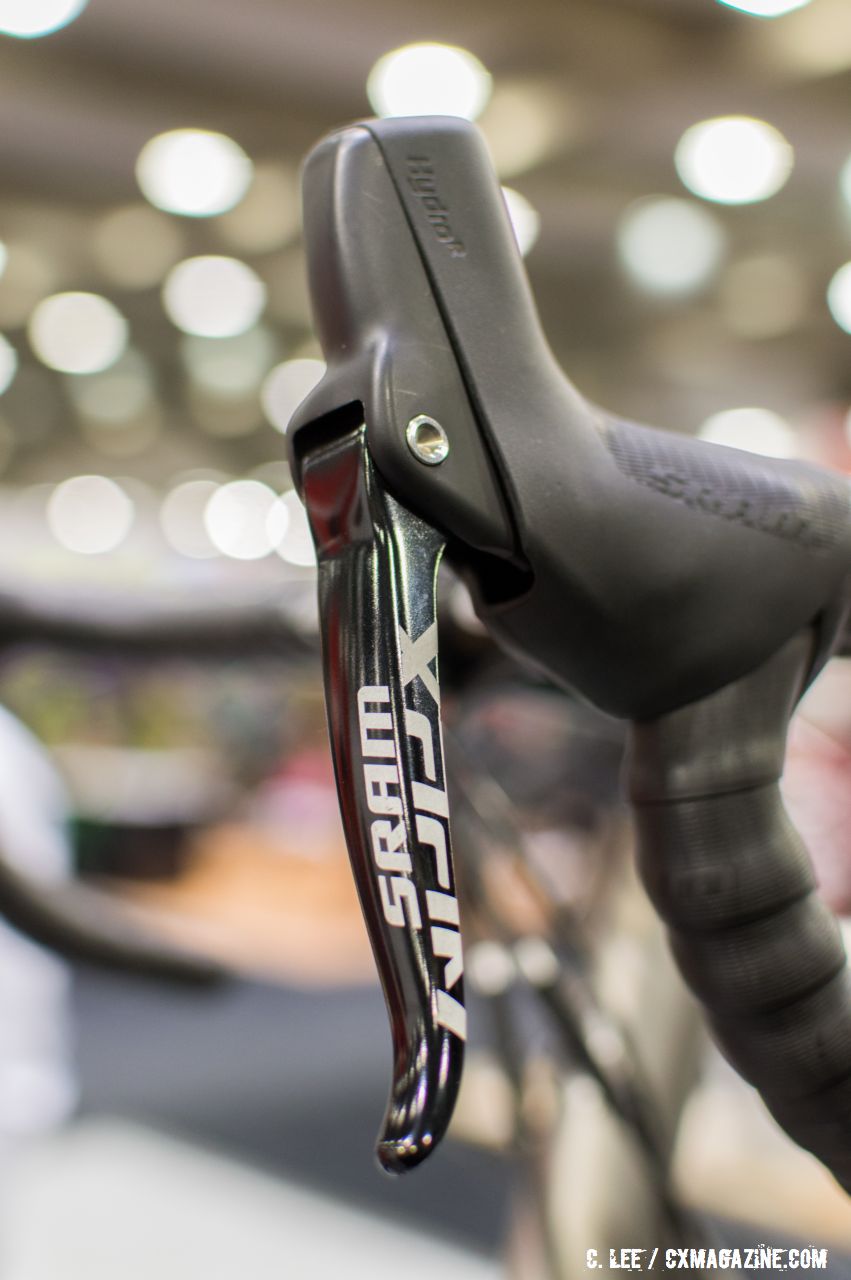
Just a few years ago we were asking if hydraulic brakes would catch on. Now there’s an offering for nearly every budget. NAHBS 2016. © Clifford Lee / Cyclocross Magazine
Again, the easiest way to tell if it’s time to reset your hydraulic brakes is if there is too much lever pull.
Olsen says that “[a]n easy way to check if the lever travel is too much is to wrap one finger around your grip and with the other hand pull the lever back. If the lever contacts your finger, the brake probably needs to be bled.” Be advised though that “if you adjust your reach so that the lever is very close to the bar to begin with, this test may not be an accurate indicator,” as Olsen said. Newton too added that “[i]f the caliper pistons are operating properly, but the brake feels soft and spongy, it’s time for a bleed.”
Disposal of Old Brake Fluid
Obviously, if you are bleeding your brakes old brake fluid has to be disposed of properly. Newton points out that for DOT fluid-based systems that riders obviously need to dispose of “[u]sed DOT fluid [by recycling] or in accordance to local and federal regulations. Never pour used DOT fluid down a sewage or drainage system or into the ground or body of water.” TRP’s Olsen also recommends checking with local policies regarding the disposal of used mineral oil.
Murdick echoed those sentiments and reminded us that “auto parts stores will take used motor oil and some will take other kinds of fluids. At every bike shop I worked at, we disposed of oil through the company that serviced our solvent tank. So bringing it to a local bike shop could be an option but since that service costs the shop money, I would expect a disposal fee and it might end up being cheaper and easier to just have the shop perform the service.” Good advice to support the local bike shop.
Issues at the Caliper During Bleeding
Bleeding brakes can of course mean needing to reset the calipers to avoid rubbing rotors and the attendant noise. And riders, including us, are always looking for tips and tricks to make sure brakes are set up correctly, especially when swapping between training and race wheels and the like.
Olsen recommends Birzman’s disc brake gap indicator, the Clam. “We’ve found this to be very effective when installing or adjusting brake calipers to get them aligned and properly spaced, said Olsen, before adding that ”[s]wapping wheels can be a bit trickier if the rotors don’t line up the same between the two sets of wheels. Using rotor spacers on one of the wheels so that the rotors line up the same with the caliper is the most effective way to solve the issue, but does require a bit of time initially to get them spaced the same.”
Murdick said that the first secret is to use a torque wrench. “Once a brake caliper mounting bolt has been over-tightened it will have a memory and want to nudge the caliper over at the last second as you tighten the bolt the next time,” he explained.
“If the bolts have never been over-tightened, simply pulling and holding the brake lever while tightening up the caliper bolts should center it up fine,” he added. “Facing caliper mounts can also help. It isn’t super useful in terms of boosting performance above the stock condition of a bike. But it can help eliminate brake rub since it squares up the caliper and makes sure that the pads are parallel to the rotor, creating as big of a gap as possible between them,” said Murdick before explaining that that is “one of the reasons [Shimano uses] resin pads as the stock choice too, they make less noise when barely grazing the rotor.”
SRAM’s Newton also pointed out the issue noting that “[i]f you’re swapping wheels the rotor may sit in space slightly differently from one hub to the next. If you’re using 6 bolt hubs, I would recommend setting up your caliper with the rotor outboard from the centerline, then using rotor shims to move the rotor on the other hub outboard until it matches.”
While we’ve heard reports that some riders opt to bleed brakes each time brake pads are replaced, that is not a necessity according to any of our experts. Newtwon said that riders should just “[m]ake sure that the pistons, which have advanced to compensate for pad wear, are re-set back into the caliper.” And Murdick added that “the number one rule of working on disc brakes is to always clean pistons before pushing them back into the caliper. Rubbing alcohol and a cotton swab work great. Never use commercial solvents, lubricants or disc brake cleaner. Caliper seals get grumpy when they are dirty or exposed to chemicals and we want to keep them happy since they are responsible for our pads auto-extracting but never rubbing.”
Other Considerations
Finally, we’ve heard issues pertaining to hydraulic brakes and air travel and brake lines becoming contaminated with air bubbles in the process. Niether Olsen or SRAM have heard of the issue. But we know one bike builder, Ndvr, that specifically specs mechanical discs on it’s new travel bike for this very reason.
Murdick said that while it’s not likely air is entering the system simply based on air travel, it could be “that air bubbles that had been safely in the lever’s reservoir have moved into the line while the bike was put in a box and laid on its side. Shimano brakes are self-bleeding in that air bubbles will tend to rise back into the reservoir if you orient them properly and cycle the lever several times. Once the lever feel comes back, the bike is just as safe to ride as it was before. It is possible to remove all air from the reservoir before travelling by getting them freshly bled.”
Regardless, Newton reminded us that when traveling with your hydraulic disc brake equipped bike to “be sure to place pad separators between the pads when packing a bike for travel, to prevent accidental actuation of the brake.”
Putting a stop to disc brake issues with regular maintenance is a good idea. Hopefully last week’s article and the information here are good starting points for you to see if it’s time for a little TLC for your disc brake setup.
Next week we’ll be talking chains. Stay tuned!