


You might not have a pit crew, but that is no excuse for leaving your bike in shambles long after race day or at the end of the season. © Todd Prekaski
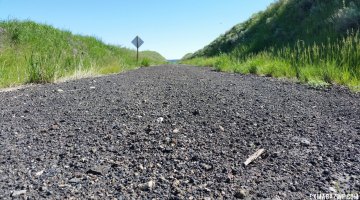
At this point of the year, it’s been a long cyclocross season for most everyone. While you got your bike to the start line of each race in hopefully great condition, the thought of going over it yet again may seem like more trouble than it’s worth. After all, cyclocross season is, for the most part, months away. But if you’re eyeing a gravel grinder in the near future, or even noodling around town or to the coffee shop on a recovery ride, you’re going to want a bike that works.
For a little weekend reading, we’ve resurfaced an oldie but a goodie from the Mechanical Monday files covering a top-to-bottom routine for making sure your bike is in prime condition. From the necessary bike inspection to make sure that your frame won’t fail on you, to ensuring clean shifting by inspecting everything down to the jockey wheels, Dave Drumm offers the full approach to maximizing your investments for the long run.
by Dave Drumm
The key to having a mechanical-free bike starts as soon as you have finished your last training ride, race or wrapped up a long season. A habit that you should get into is cleaning your bike as soon as possible, before the mud and grime have a chance to set in. If you have a workstand, wash the bike with the wheels removed and handle them as a separate entity. Once your bike has been washed with soap and water and all visible muck is removed, wipe your bike down with a clean, soft rag. Use this time to inspect the bike as you go along, starting from the top and moving to the bottom as you inspect the frame and fork for any visible damage, such as nicks in the carbon, cracks or dents.
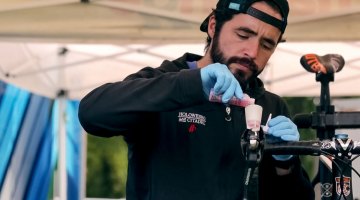
Once done with the frame, inspect your shifters and brake levers. Squeeze the levers and look inside–mud and dust will often work it’s way into the junction between the lever and the body. Clean it out to the best of your ability. Wipe and inspect the cable housing look for any cracks or wear areas–if it looks suspect, it’s time to change it. Inspect the brakes making sure that they move freely and check the pads for debris. If it looks like there is metal or particles in the pads themselves use a flat file to remove a thin layer of the contact patch. When doing this be sure to use quick light strokes keeping the file flat against the pad. If filing does not remove the embedded debris, replace the pads. This debris will damage the braking surface of your rim.
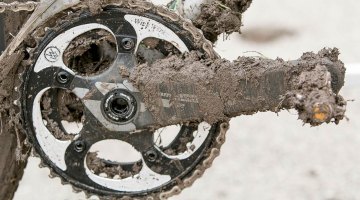
Next check that your crank spins freely without a lot of drag or noise. Grab the driveside crankarm and check for play in the bottom bracket. If there is place or excessive noise or drag it should be replaced. Check that your chainring bolts and crank arms are tight. Inspect the front derailleur for wear and excessive play. If you are using a single chain ring setup check the guides to insure that they are not making contact with the chain and are within tolerance to prevent your chain from falling off. Inspect your pedals–they should move freely and with out noise.
Now inspect the chain. Make sure it’s clean and that all links move freely. The best way to do this is to grasp the chain lightly in a rag and back pedal the crank slowly with your free hand. If there is a stiff link, it will be evident. If you have a chain checker, use it to check the wear. If it is greater than 75% replace it. Inspect the rear derailleur, making sure it operates freely. Shift your bike in to it’s easiest gear. Now grasp the rear derailleur with one hand and shift quickly into the hardest gear.
The cable should become slack. While slack, slide the housing out of the cable stops. The inner wire should now be exposed. Wipe the cable with a clean rag. If the cable is bent or frayed, replace it. If it looks fine, use a light lube, like Boeshield T-9, and apply to the piece of cable that will be inside the housing. Wipe off the excess lube and reinsert the housing into the cable stops. Check that everything is back in place correctly by shifting through the gears. It should move easily.
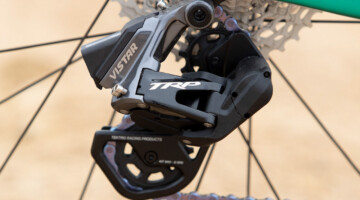
Next, inspect the jockey wheels on the derailleur. They should be clean and spin freely–if they don’t, they’ll need to be overhauled or replaced or you risk breaking your derailleur off the next time it gets caked with mud. Move back up to the rear brake. With the wheel removed, you should be able to slide the brake cable housing from the cable stops with little effort.
Wipe and lube the cable in the same fashion as you did with the derailleur cable. Reinsert the housing and squeeze the brake lever to make sure it is seated correctly. It’s much more difficult to do this to the front brake cable, but most of the time the front brake will be fine. If your front brake does not move smoothly, replace the housing and cable.
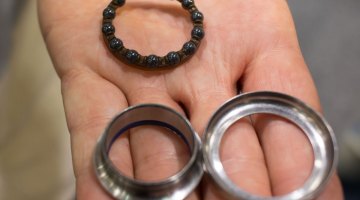
Now it’s time for the wheels. Inspect the cassette of the rear wheel. It should be clean and free of debris. Spin it by hand. It should spin easily. Check the forward motion–there shouldn’t be any movement once the pawls of the freehub body have engaged. Wipe down your rims’ braking surface with a clean rag and check that the surface is still flat. If it’s excessively concave, it’s time to start thinking about new rims.

Tubular inspection can save your day! © Dave Drumm
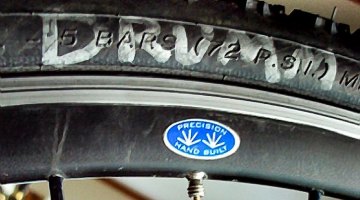
Reinsert the rear wheel and run the bike through the gears. Hook up the brake cable. Test the brake and then spin the wheel. Does the brake make contact with the wheel without applying the brake? It shouldn’t. If it does, the wheel needs to be trued. When applying the brakes, make sure that they make contact with the rim at the same time on each side. If they don’t, you’ll have to adjust the brakes until they do. Before doing this, double check that the wheel is in the drops completely. Inspect the tires for any cuts, holes, abrasions or abnormalities. Replace as needed. If you are running tubulars, with the tire inflated, try to push the tire off the rim with your thumbs. Check this around the entire tire. You should not be able to do this. If you can, they need to be reglued and this process just saved your next race and maybe your collarbone. Now lube your chain, hang up your bike and go grab a beer. You’ve earned it.
This whole process doesn’t take very long and you should make this part of your cleaning routine. As a mechanic for a Pro Cycling team I have found that this routine is one of the best ways to ensure a mechanical free race. It is the only way to find problems before they become an issue.
Dave Drumm
Equipment Manager, Head Mechanic
Webcor Builders Pro Cycling Team
http://jetsetbikemechanic.wordpress.com/