


Proper bike packing can save you money in broken gear and headaches on race day. © Daimeon Shanks
Daimeon Shanks, pro mechanic and co-owner of The Service Course repair shop in Boulder, Colorado, shares his wisdom this week on how to pack your bike like a pro. Missed the last article on pit etiquette? Go back and check it out. Now that you’re licking your – and your bike’s –wounds from this past weekend, prepare for the races ahead with a pro setup that’s sure to see you through to glory.
by Daimeon Shanks
Packing a Bicycle
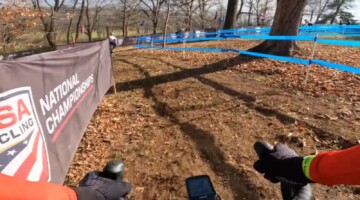
With Cyclocross Nationals right around the bend (pun intended), I thought it would be a good idea to discuss the proper way to pack your bike for travel. While it may be a boon for many of the local shops, improperly packing your bike can result in costly damage. You may not be able to compete at all in an event that you’ve spent most of the season preparing for and have traveled to at great cost.
Whether you’re using a bike box, bag, or fancy polycarbonate shell, the procedure for packing your bike essentially stays the same. Sometimes the dropout savers are built into the bag, sometimes you may need to leave the rear wheel on, but those are small variations on the technique.
I recently picked up all of my supplies from the good folks at Sunnyside Sports here in Bend, OR where I’m preparing for this year’s Nationals with the Rapha-Focus team. Here’s a list of what you’ll need:
Supplies Needed
- A bicycle box or bag
- Bubble wrap, or other protective wrap
- Zip Ties, various sizes
- Dropout Savers
- Hub Plugs
- Packing Tape (if using cardboard box)
Steps:
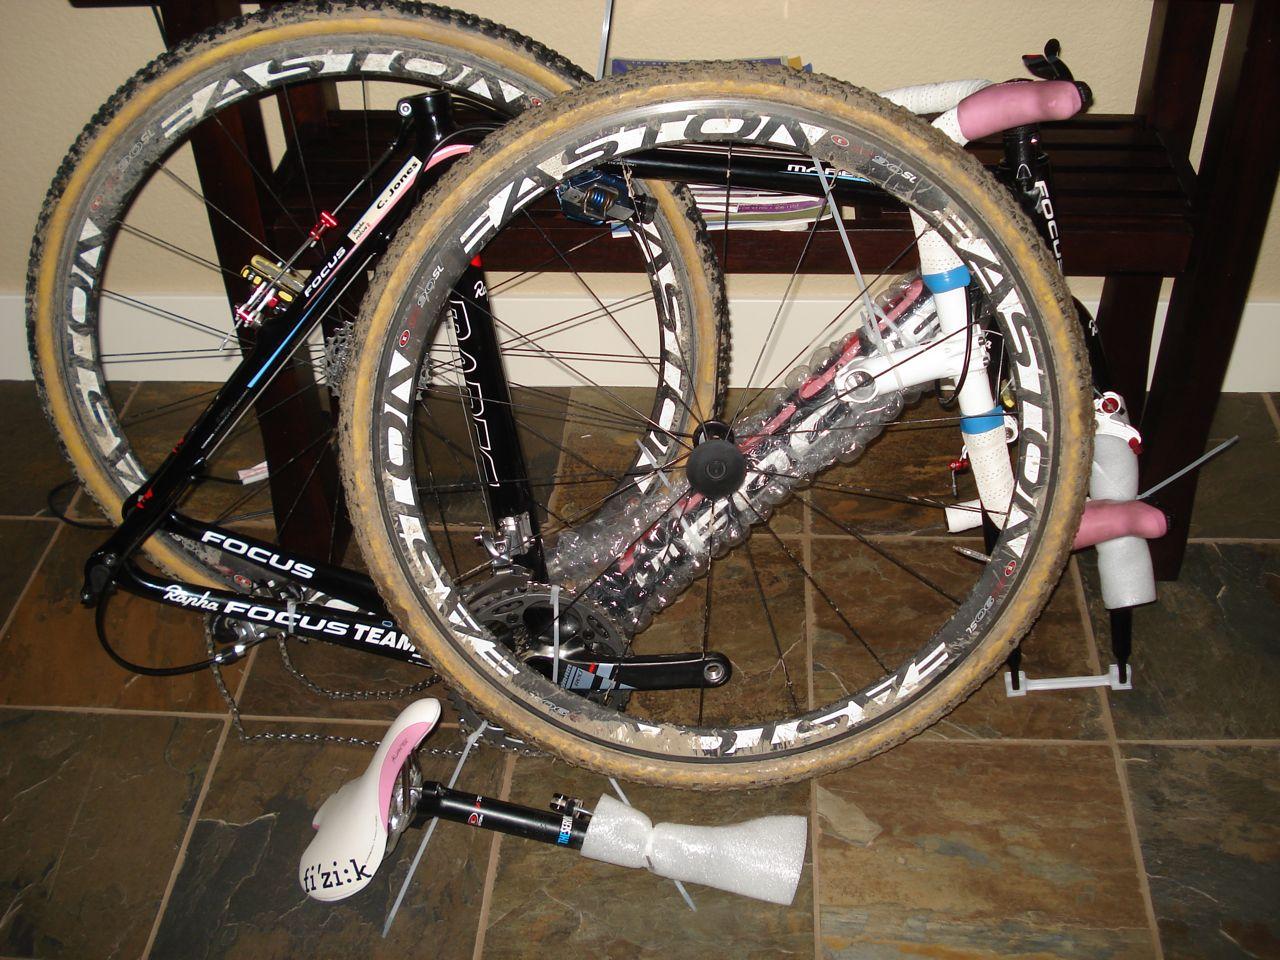
- Remove your wheels from your bike. Set them aside.
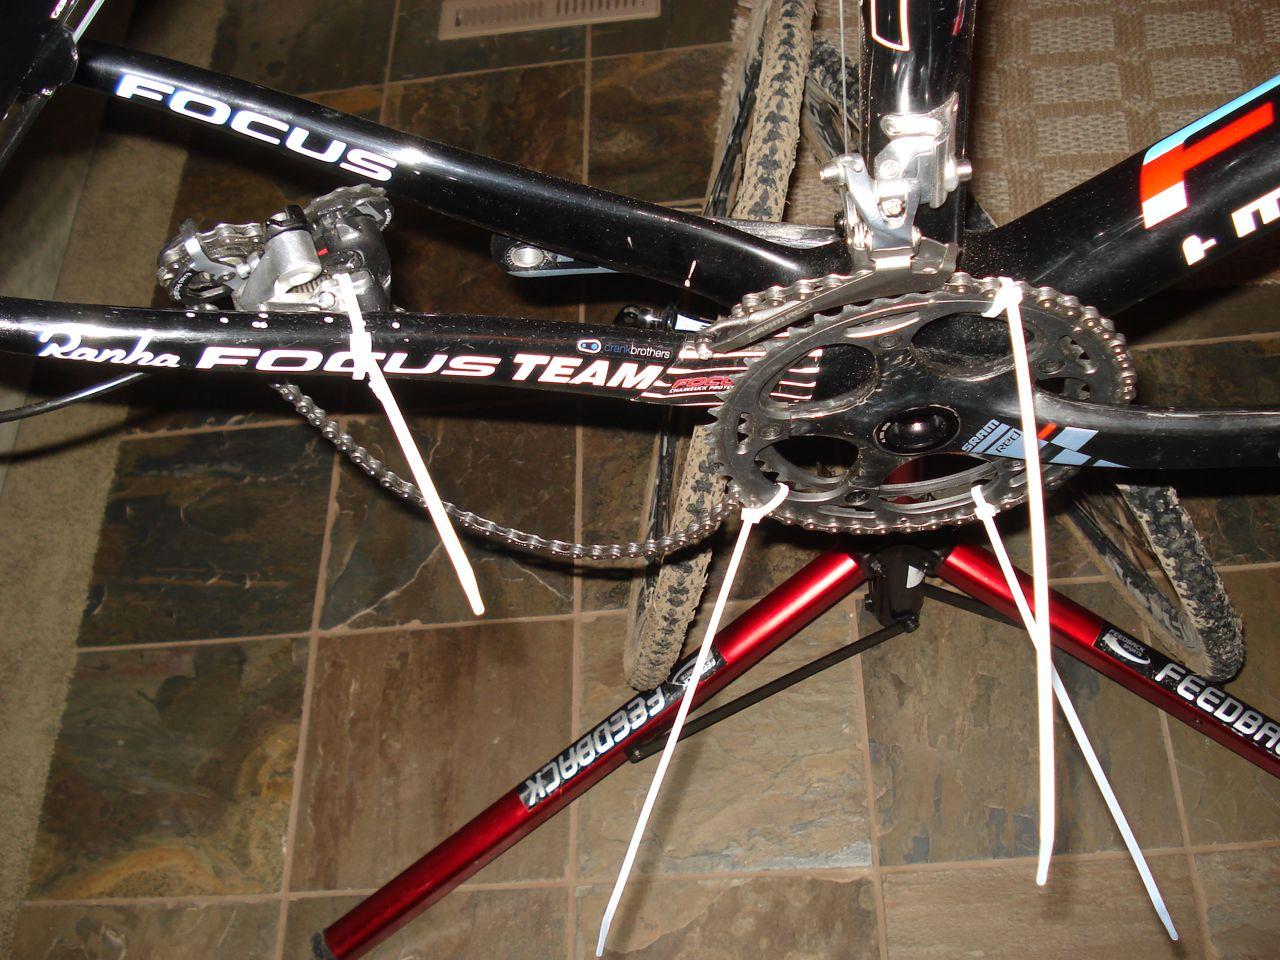
- Remove your pedals. Zip-tie them to the top tube.
- Zip-tie chain to large chain ring. This is to protect your chain ring teeth from being bent or broken in the box.
- Remove rear derailleur. Place a zip-tie through the rear derailleur cage and attach it to the inside of the chainstay. This is to protect your rear derailleur hanger if the bike takes a whack from the side.
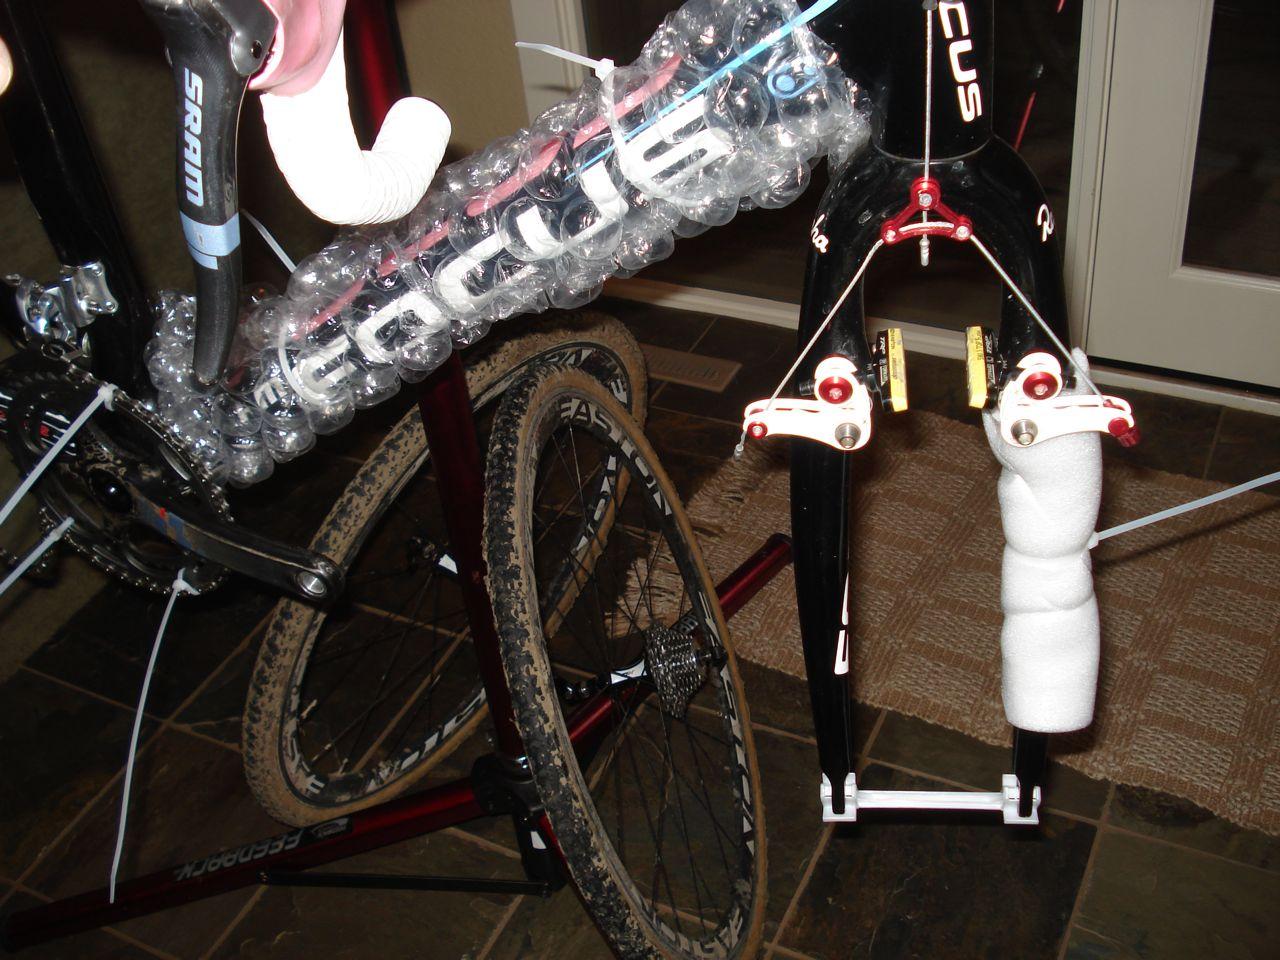
- Place dropout savers in frame. Plastic dropout savers can be acquired easily from any bike shop. Always, always use dropout savers to protect your frame!
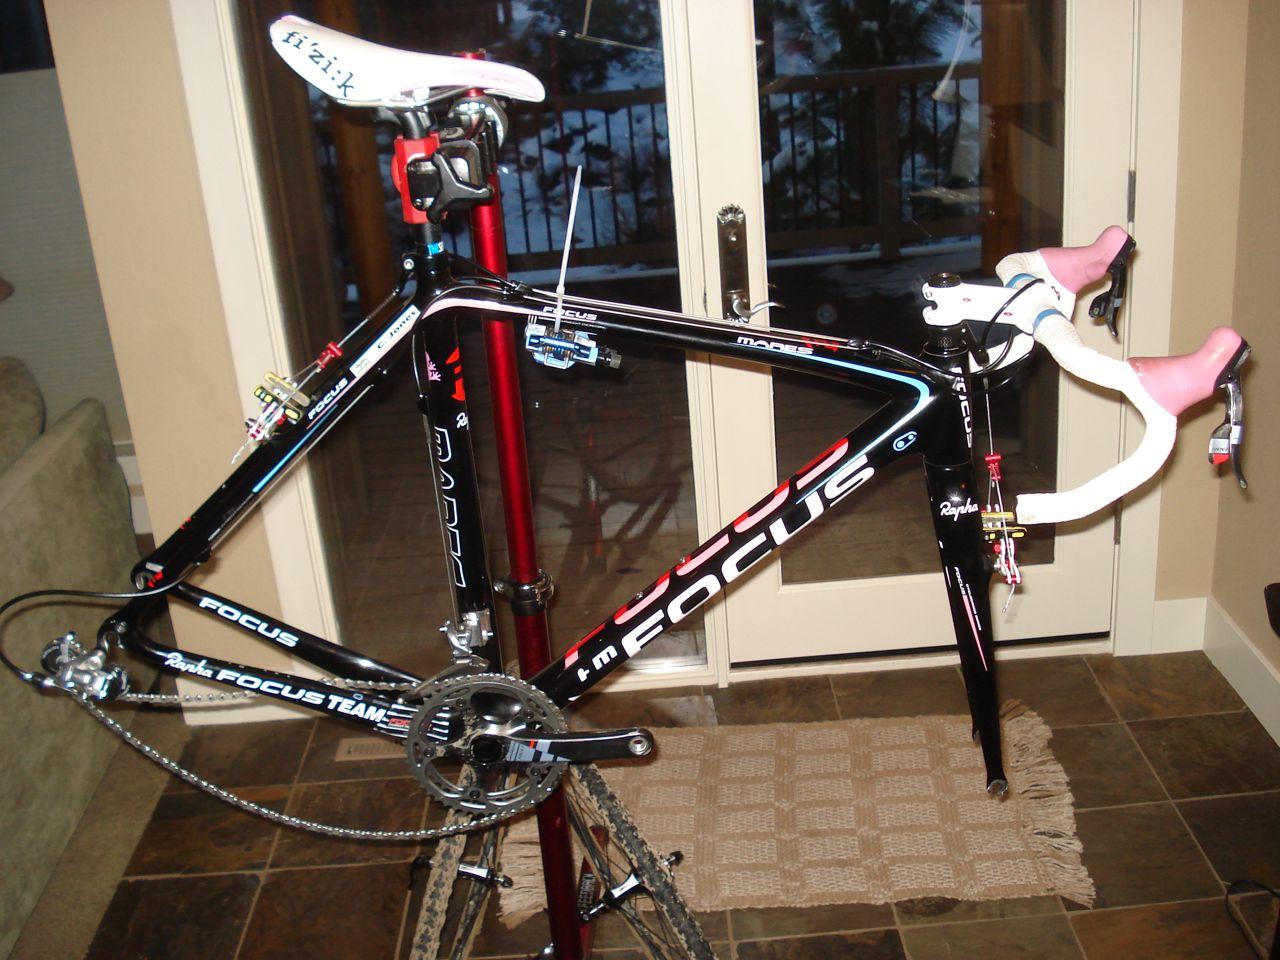
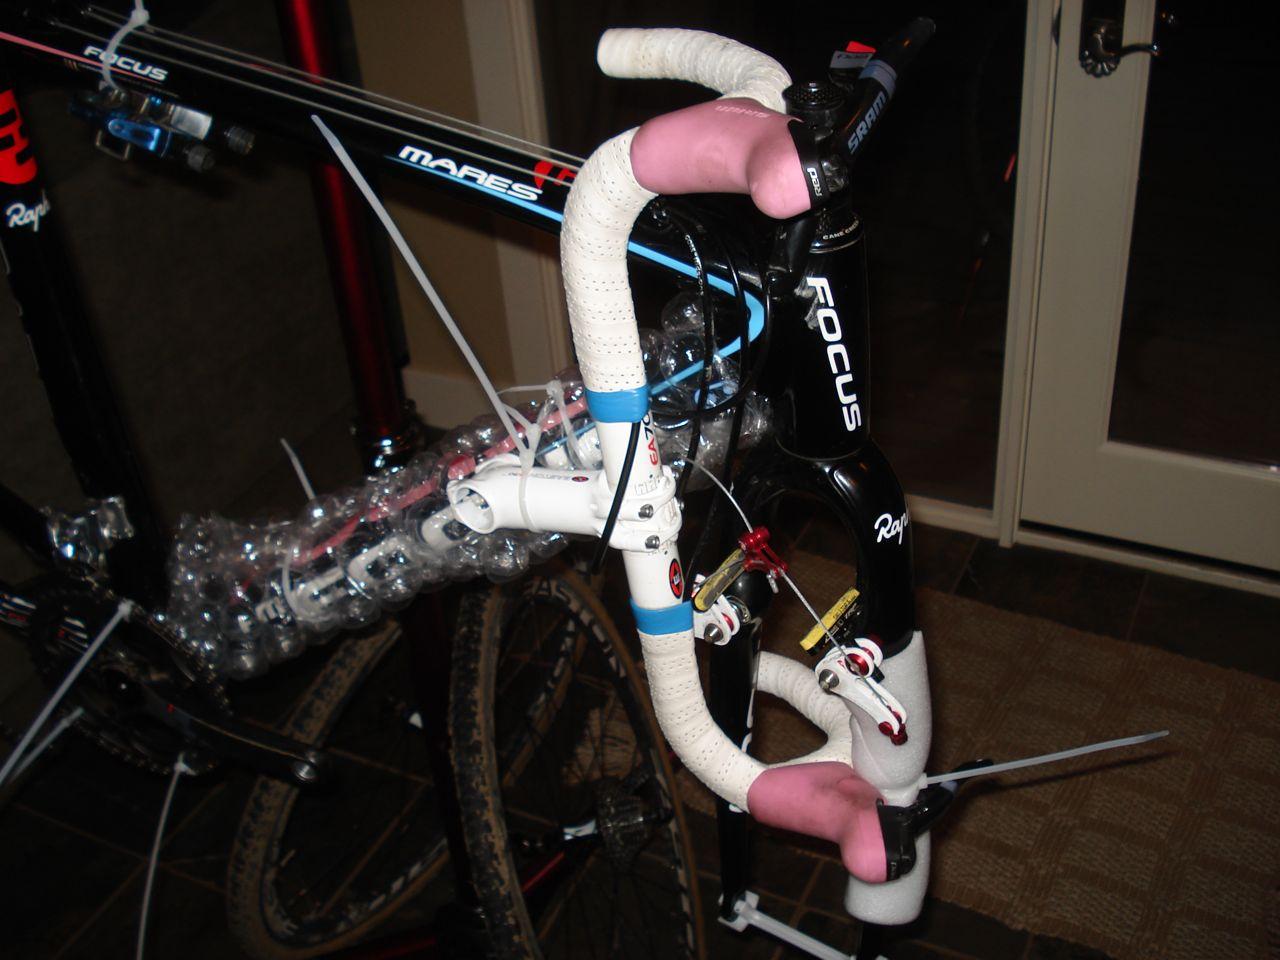
- Bubble wrap frame/fork. Use your packing material (bubble wrap, pipe insulation, cardboard tubes, etc.) and wrap around the down tube and non-drive side of your fork. Zip-tie in place. Tape can be used, but use masking tape so it won’t stick to the bike and ruin the paint job.
- Remove handlebar. Make sure to reattach and tighten your headset cap.
- Zip-Tie stem. Place stem next to down tube and attach with a zip-tie. Notice how the shifter threads through the fork legs—that’s the reason for the non-drive side packing material.
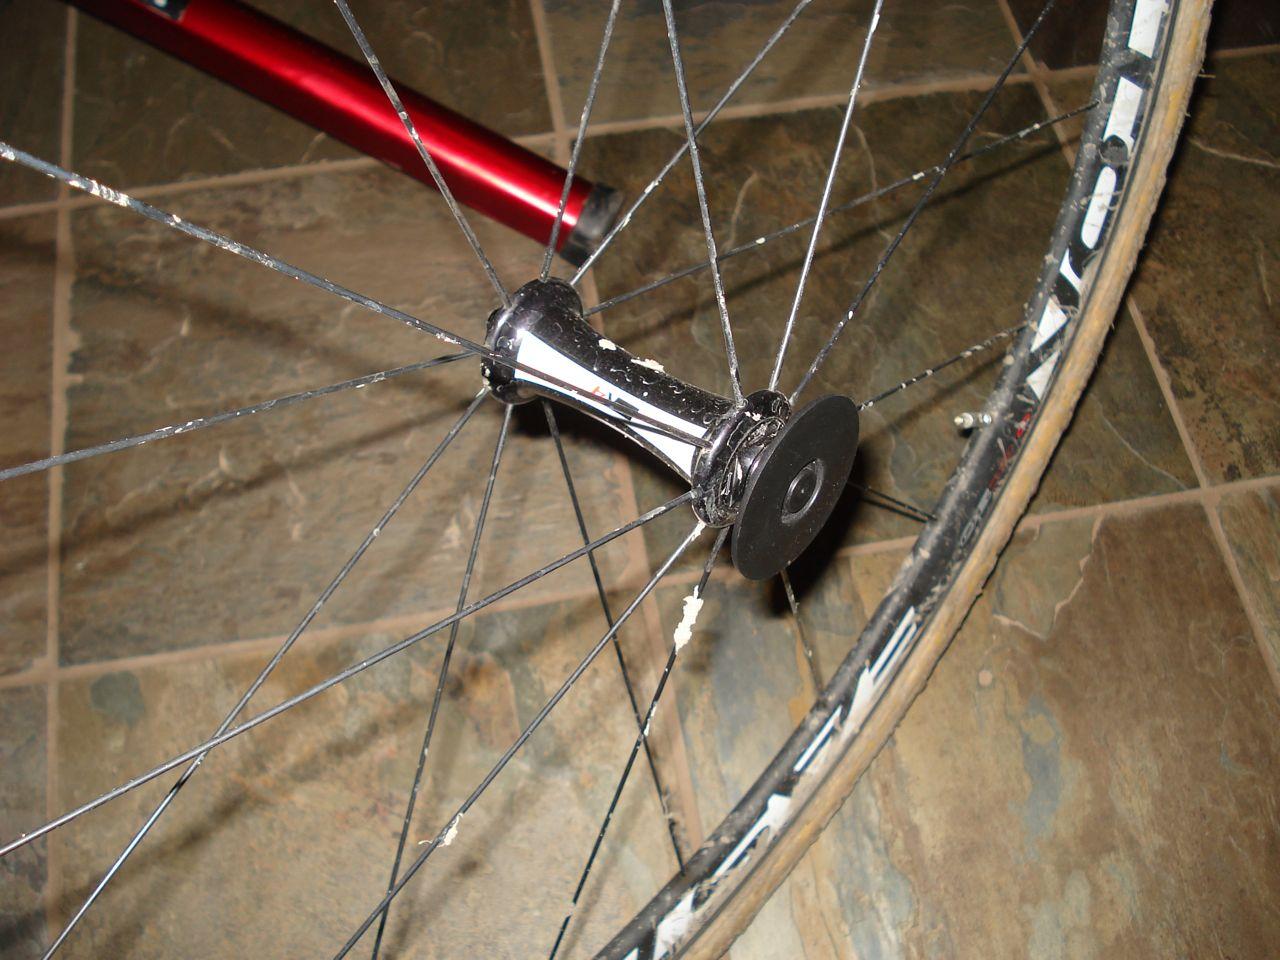
- Install Plugs in Hubs. Remove the skewers and set aside. Install plugs in both sides of both hubs.
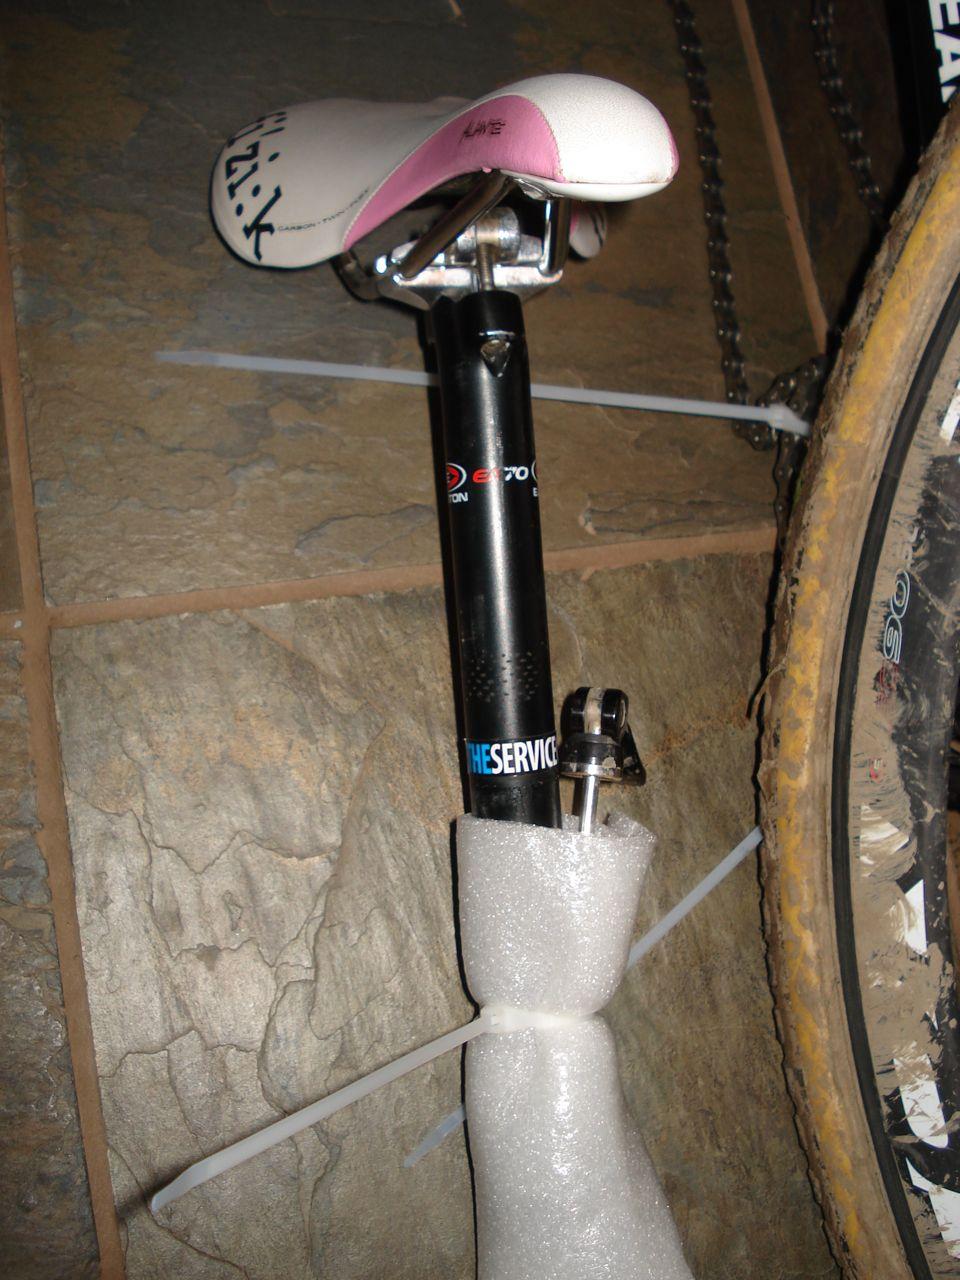
- Remove seatpost. Remove your saddle and seatpost and wrap in packing material. Re-tighten your seatpost clamp. I usually zip-tie the skewers to the seatpost so they never get lost.
- Slide your bike in the box. Wedge you saddle/seatpost in so that it won’t flop around and damage your bike. Slide your wheels in on each side of the bike. Use packing material or a couple of pieces of cardboard to keep the wheels from scratching anything.
That’s it! Make sure to bring the proper tools with you to rebuild your bike once you get there, or you’ll still be running to the bike shop at the last minute!